What is a Soaker Hose?
When choosing a garden hose, there are many different garden hoses to choose from. Amongst them is a soaker hose, which functions differently to other different types of hoses.
Soaker hoses are used to water flower beds, vegetable patches or other long areas of yard, by producing a gentle but constant stream of water which enables the plants around it to soak it up without overwhelming them.
Soaker hoses come in many different sizes and lengths, and may be somewhat confusing if you’ve never used them before. Thankfully, they’re easy to understand and use once you have familiarized yourself with them.
Should I Use a Soaker Hose?
When buying a soaker hose, you should consider their uses first. Soaker hoses are not designed to cover a whole yard and are not a replacement for a full irrigation system. They’re made specifically for long strips of grass, flower beds or vegetable patches that will require a gentle, even watering that is not too dissimilar to what is produced by a watering can, but is more effective and less time consuming. Due to the slow release of the water, the plants below are more likely to absorb it fully as opposed to some other methods of watering.
How do Soaker Hoses Work?
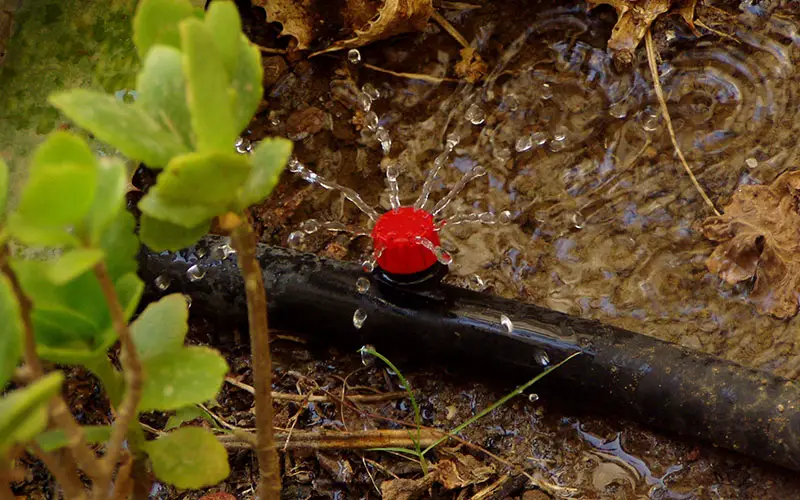
Soaker hoses are a type of hose used mainly for watering plant beds and vegetable patches. They are laid in amongst the shrubs and foliage and produce a gentle, steady stream of water through the holes that are present in the hose. Soaker hoses don’t produce a great deal of water, and are left running for a while to allow the plants surrounding them to absorb what is being produced.
Soaker hoses are capped at the end so that the pressure forces the water to come out through the holes in the tubing. This is what mainly separates soaker hoses to more traditional garden hoses. Soaker hoses can work in tandem with other irrigation methods, or they can be used solely on their own depending on the garden and environment that they’re used in.
Soaker hoses can also be used to water fresh grass seed, due to the gentle nature of their irrigation. The main issue when it comes to soaker hoses is deciding on its placement and how it is connected to a water supply.
How to Use a Soaker Hose
Soaker hoses can be used as a temporary means of watering plants, or they can be utilized for more permanent use. How you set up your soaker hose will help determine how much use you’ll be able to get out of it. Different shapes and sizes of soaker hoses can be purchased to suit a variety of different needs. Whilst they’re commonly used for long areas of the yard, it’s also possible to purchase soaker hose kits that are designed for square, circular or other irregular shaped flower beds.
How Often Should You Water Using a Soaker Hose?
Watering using a soaker hose is slightly different to watering using a watering can or underground irrigation system, mainly due to the types of plants and seed that the soaker hose is designed for. There are also different brands and water hose systems which operate differently, so the answer comes down to a combination of all these different aspects.
In general terms, soaker hoses should water an inch deep once a week. Whilst this may not seem like a lot, it’s often more than enough for plants to thrive on. In the heat of summer, it may be recommended to water twice a week due to the risk of evaporation. One way to test how much water your soaker hose produces it through the tin can test.
The tin can test involves placing a container just underneath the soaker hose, allowing the system to run as normal, and then checking how much water is inside the container. This indicates how much water is being provided for the flowers in the area.
How to Connect Soaker Hoses
Soaker hoses are relatively easy to install. Most kits will come with an installation manual, but generally speaking, they should also connect to a water supply in similar ways.
When it comes to installing a soaker hose, one thing that needs to be considered is how the water will be travelling to the hose. A soaker hose can be attached to a regular garden hose which is attached to the faucet for added length, but it can also be attached via a pre-existing irrigation system if one is already in place. Before installing your soaker hose, make sure you have the equipment ready to attach it to the faucet or water pipe already installed.
Assuming you already have an idea on how the water will reach your soaker hose, you can now begin to take steps to install it.
Faucet Setup
If you’re attaching your hose directly to the faucet, you may need a particular adapter or attachment for your faucet. Make sure that your faucet’s attachment is right for your soaker hose. If not, you can easily purchase adapters or a new faucet attachment.
In addition to this, it’s always recommended to use a pressure regulator. Pressure regulators work by slowing the flow of water before it reaches the hose, preventing damage to the hose or too much water being produced. Soaker hoses are notoriously fickle when it comes to water pressure, as they need just enough to push the water out from, but can be easily damaged if the water pressure is too high. A water pressure regulator makes it easier to monitor and keep your soaker hose working correctly for longer.
In addition to this, you can also opt for a timer to ensure that your plants are watered on a punctual basis.
Layout
Choosing the layout of your soaker hose is the more interesting part of installation. When choosing your layout, make sure that the hose follows the areas that need watering. This may take some trial and error, but generally speaking, the hose should follow through along flower beds and should loop around trees to ensure that all is evenly watered.
To test if your layout is right for your garden, after running the soaker hose, dig a small hole nearby about 30 minutes later and check how damp the soil is. If it has retained some water, you can rest assured that your soaker hose is working correctly in the position that it’s in. Soaker hoses work best when used at a length of around 25ft. Whilst some are available to buy up to 50ft, they often suffer with maintaining a healthy amount of water pressure. Make sure that when positioning the soaker hose, that the lines are no closer than 24” apart to ensure that some areas aren’t overwatered.
Maintaining a Soaker Hose
As with all parts of an outdoor irrigation system, a soaker hose needs to be maintained to keep it running correctly. Maintaining your hose can increase its longevity and reduce the amount of replacements or repairs needed in the future. Like all watering systems, the sprinkler hose is best used in spring and summer months, and drained and winterized during colder months. This is to reduce the risk of it freezing, which can lead to unwanted damage as ice expands beneath the surface. A damaged soaker hose will lead to loss of pressure, uneven watering, and will most likely require a replacement if a patch repair is unviable.
In addition to this, the water pressure should be monitored when using a soaker hose, as an increase can also lead to damage of the casing. It was previously suggested that a water pressure regulator should be installed alongside the hose.
A soaker hose should also be protected against the elements, including the sun. Some rubber that soaker hoses are made from can experience weaknesses due to UV light over time. Even though some rubbers are made to withstand this UV exposure, it’s still good practice to reduce any risk to the hosepipe. One way of doing this is to cover the pipe with leaves or mulch that is already present in the flowerbeds that the hose is residing in. Making sure not to clog or cover the holes of the hose, gently layer mulch atop of it to cover it just enough. This also helps cosmetically, as it ensures that the hose is less noticeable.
How to Make a Soaker Hose
A soaker hose can be easily created using commonly found household equipment. In order to make a soaker hose, you’ll require the following:
- A drill, preferably with a small drill bit of 1/ 4”.
- Old garden hose
- A hose cap
An old garden hose is the ideal subject for creating a soaker hose out of, as it reduces waste and can breathe new life into something that may have just been discarded otherwise. Ensure that the garden hose you’re planning on upcycling is rubber and isn’t suffering from too much damage first.
Step 1 – Prepare the Hose
Once you’ve found a suitable old garden hose, you can immediately begin to prepare it. Using the drill, carefully create holes evenly along the length of the hose, being sure to only drill through one side of it. Drilling through to the other side can affect pressure, which, as discussed earlier, is the last thing you want to affect when creating a soaker hose.
Step 2 – Adding a Hose Cap
The hose cap should be added at the end of the hose where water would normally flow from. By capping it off, you are redirecting the water out of the holes that have just been drilled into the sides of the hose. The hose cap should fit snugly and tightly, and should not allow any water to drip from it.
Step 3 – Add Any Attachments
Make sure that if you’re attaching an extension to your soaker hose to do so, and make sure that it is connected properly to the water supply. Any splitters, timers or water pressure regulators should be added now.
Step 4 – Test it Out
Make sure to give your soaker hose a trial run to fine-tune any adjustments that may need to be made. As this is a DIY project, the recommended water pressure may need to be adjusted and readjusted several times to find the perfect balance. If you’re finding that your water pressure is too low, there are ways in which it can be increased. These methods are used mostly for underground irrigation systems but some can also work for overground ones and sprinkler hoses.
Advantages and Disadvantages of Soaker Hoses
As with every irrigation system, there are different advantages and disadvantages to consider when purchasing a soaker hose.
Advantages of Soaker Hoses
- Soaker hoses produce less waste water than many other irrigation systems, due to their slow release, allowing plants to absorb it.
- Soaker hoses are also inexpensive compared to other irrigation systems due to their simplicity.
- Soaker hoses can work in tandem with other irrigation systems to keep the whole garden watered.
- Soaker hoses are also easy to install and don’t require professional knowledge to do so.
Disadvantages of Soaker Hoses
- Soaker hoses are not ideal for spot watering, and the better alternative for this purpose is drip irrigation.
- Soaker hoses are susceptible to UV damage, even if buried under mulch.
- Soaker hoses work best for specific garden conditions.
- Soaker hoses shouldn’t be used in replacement of a full irrigation system.
Final Thoughts
Soaker hoses make a great addition to any garden that has a flower bed or small area which requires gentle watering that a standard irrigation system isn’t suitable for. Soaker hoses can reduce time spent watering, and provide an even and substantial amount of water for the purpose that they were built for. In addition to this, they’re easy to install and even DIY once the correct materials are together. If you don’t have a comprehensive irrigation system, soaker hoses are easy to install directly onto a faucet. And if you do have a comprehensive irrigation system, it’s just as easy to add a soaker hose onto an attachment and reap the benefits.

