How to Test Soil pH
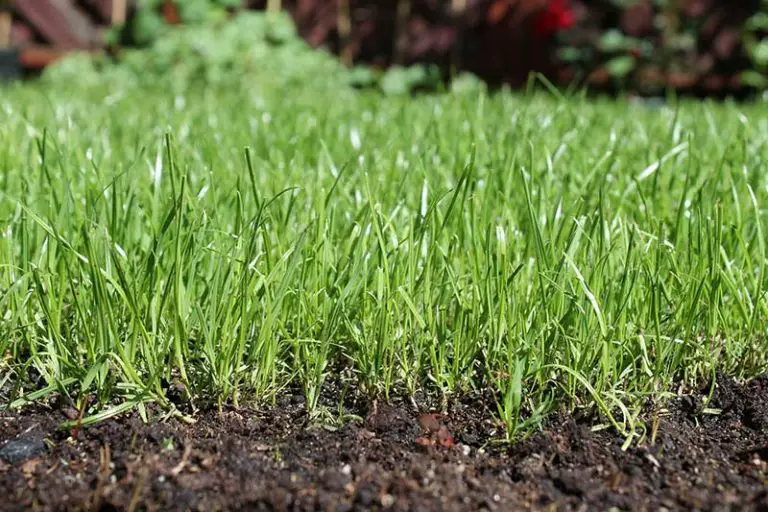
Often overlooked, the pH of your soil plays a crucial role in the health of your grass and plants. If your plants seem to be suffering but you can’t understand why, it’s very likely that an incorrect soil pH level is the culprit.
There are several different methods you can use to test soil pH, ranging in accuracy and price. You have the option of using store-bought pH test strips, chemical pH test kits, or digital soil pH meters. Alternatively, you can use a DIY method involving baking soda and vinegar to get a rough measure of your soil pH.
Read on to learn more about the importance of soil pH and the different options available to test soil pH, along with step-by-step instructions on how to carry out each method.
What is Soil pH?
The pH scale is a scientific measurement of how acidic or alkaline a certain substance is. This scale ranges from 0 to 14, with 0 to 6 being acidic, 8 to 14 being alkaline, and 7 being neutral. Depending on factors like your local environment and fertilization practices, your soil falls somewhere on this pH scale.
Most plants will thrive in soils with a pH of 6 to 7.5, and most soils in the US fall between a pH of 6 to 7. However, there are some plants that prefer more acidic soil, and some that prefer alkaline soil. Also, the pH of your soil can be affected by a number of environmental factors such as water, heat, and bacterial activity.
Why Do I Need to Test Soil pH?
The main reason why you should test your soil pH is for the health of your plants – different plants require different soil pHs in order to be able to take up nutrients from the soil. Other aspects of your soil’s health like its active bacteria, structure, and toxicity levels are also affected by its pH level. Furthermore, soil pH levels often vary based on your soil type.
Encourage Soil-Friendly Bacteria
The bacteria that live in your soil play a key role in the release of nitrogen from fertilizers and other decomposing organic matter. Nitrogen is an essential primary nutrient that all plants need to thrive, why this bacteria is so important. The bacteria are most active in soil with a pH range of 5.5 to 7. Their activity slows down outside of this pH range, which can negatively affect the availability of nitrogen to your plants.
Reduce Nutrient Leaching
Your soil’s ability to resist nutrient leaching can be improved with the right soil pH. Nutrient leaching occurs when the soil loses nutrients as a result of water seepage. Keeping your soil in the range of pH 5 to 7.5 slows down the leaching of nutrients that occurs in soils with a pH lower than 5.
Improve Nutrient Availability
The availability of nutrients to plants growing in your soil depends on its pH. Calcium, magnesium, and phosphorus, and a number of other micronutrients become unavailable to plants in soils that are too alkaline. Nutrients are most available in soils that have a pH in the range of 5.5 to 6.5.
Reduce Nutrient Toxicity
Some nutrients become highly toxic in soils with an acidic pH. If the soil pH level is less than 5, aluminum and manganese become too readily available to plants. This causes nutrient toxicity, which can stunt the growth of plants or kill them altogether.
Improve Soil Structure
If your soil is very clay-heavy, the soil pH can have an impact on its texture and how hard it is to work with. Clay-heavy soils are malleable relatively easy to work within the range of pH 5.5 to 7. However, if the soil pH falls outside of this range, it takes on a more sticky texture that makes it more difficult to work with.
When Should I Test Soil pH?
You should test your soil pH every time you’re preparing to plant a new crop or garden bed. We also recommend testing your soil pH before planting new grass seed to provide it with the optimal growing conditions. Aside from this, you should test soil pH every 2 to 3 years, particularly if you have had to add pH amendments in the past.
In terms of the time of year, the best time to test soil pH is during the fall. This enables you to amend the soil before the winter season in anticipation of the next growing season in spring. At this time of year, you can take note of the weeds that have grown in your yard throughout summer, as this can also be an indication of soil pH. If you have acidic soil, you will likely see dandelions, plantain, or wild strawberries; if you have alkaline soil, it’s likely you’ll see chickweed, chicory, or Queen Anne’s lace.
Methods Used to Test Soil pH
There are a few different types of kits that you can use to test soil pH, ranging in price and accuracy. These include soil pH test strips, chemical pH test kits, digital soil pH testers, and portable soil pH meters. We have gone into more detail below about the pros and cons of these different methods of pH testing.
Soil pH Test Strips
pH test strips are strips of litmus paper that have been coated with a dye that reacts to pH. When the pH test strip is exposed to a liquid substance, it will react and turn a different color. The color that the test strip turns corresponds with the tested liquid’s pH level, which can be found on a chart that comes with the strip.
Accuracy:
This type of soil pH test is one of the easiest and most cost-effective methods of testing soil pH, but it isn’t the most reliable. As soil is dark in color, it may stain the test strip, making it harder to determine what color the strip has turned. Even if you can see the strip, it’s often difficult to judge what color it has turned; the color may look different under different lighting, and this judgment can vary from person to person.
Also, pH test strips aren’t as accurate as other methods used to test soil pH. pH test strips are only able to test pH to the nearest 0.5 pH units, so you won’t be able to determine what your pH is to the exact decimal. Being 0.5 pH units off your true reading could lead to an over- or under-application of your pH-adjusting material. This would then require you to readjust your soil pH all over again, in addition to potentially killing your plants.
Chemical Soil pH Test Kits
Chemical pH test kits work in a similar way to pH test strips. They involve taking a sample of your soil and adding it to a tube, along with some distilled water and the chemicals provided with the kit. The chemicals are pH-sensitive and will react and change color depending on the sample’s pH level.
Accuracy:
Chemical soil pH test kits are another cheap and easy way to test soil pH. However, they share the same disadvantages as pH test strips. The color that the liquid turns will be subjective, so readings will vary from person to person. They are even less accurate than pH test strips, being able to read pH to the nearest 0.5 to 1 pH unit. They tend to be used to test for a pH range, rather than an exact reading.
Another drawback is that the number of tests you can carry out with one kit is limited to the number of chemical reagents included with the kit. The majority of chemical pH test kits will come with enough reagents to last between 1 and 10 tests. Also, it can be difficult to know how to safely dispose of the chemicals once you’re done with the test as they cannot be thrown in the trash or poured down the drain.
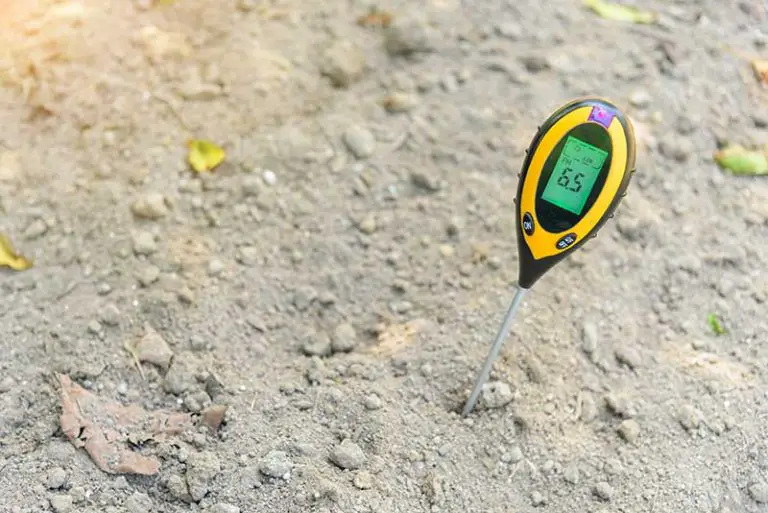
Digital Soil pH Testers
Digital soil pH testers are small electronic devices that measure pH using a protruding electrode housed in a durable casing. When placed directly into your soil, the pH electrode measures the pH, which is then displayed on the device’s LCD screen.
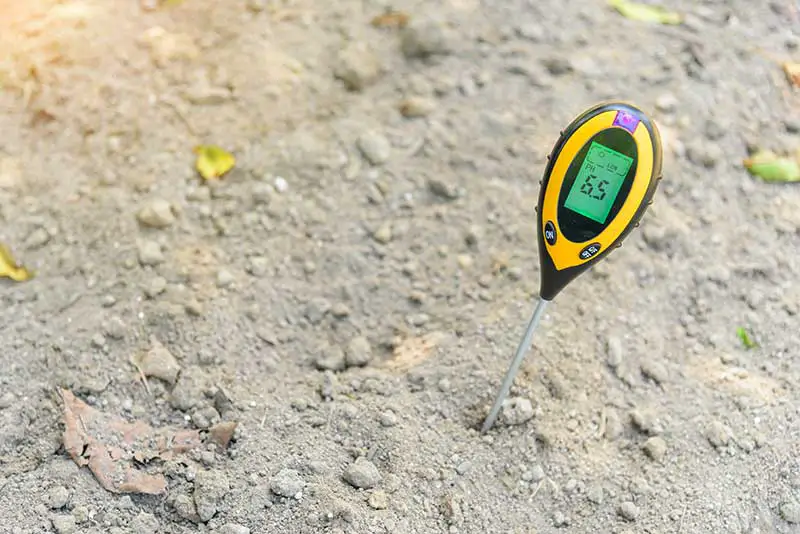
Accuracy:
Compared to pH test kits and strips, digital pH testers are a much more reliable way to test soil pH. They provide a numerical pH reading rather than the subjective method of judging a color change against a chart. Also, they determine the soil pH with a higher degree of accuracy, measuring to the nearest 0.1 pH unit.
As these devices are small and portable with a simple interface, they make it easy to test soil pH. Some devices will come with extra features, such as being waterproof or specifically designed to test in humid environments. Some digital pH testers also have a cloth junction to prevent the electrode from becoming clogged with soil. The cloth can be cleaned of small soil particles by tugging on it with tweezers. This feature will elongate the life of the tester’s electrode.
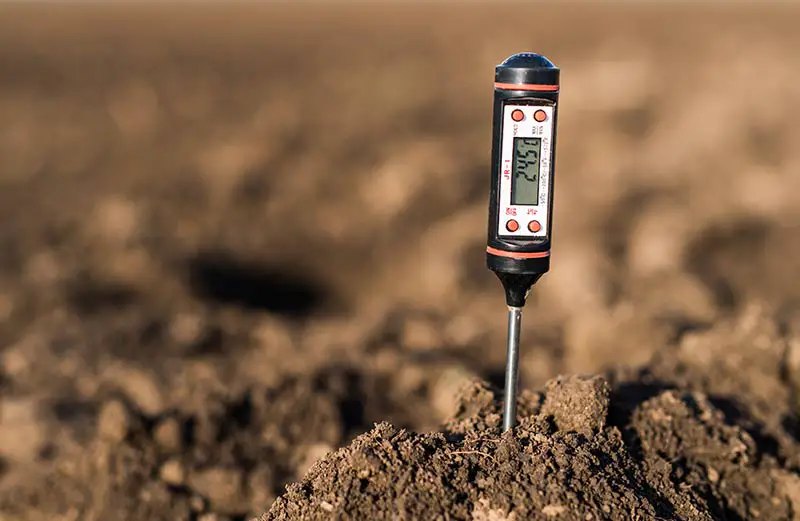
Portable Soil pH Meters
In essence, portable soil pH meters are the upgraded version of digital soil pH testers. They have an LCD screen and an electrode, but they’re slightly larger in size than a digital pH tester.
Accuracy:
Portable soil pH meters provide readings with lab-grade accuracy. These devices feature automatic temperature compensation, having a temperature probe that’s either separate from or integrated with the pH probe. The accuracy of a soil pH meter reading is almost exact, as they’re able to measure to the nearest 0.001 pH units.
Another feature of soil pH meters is the ability to log data about your readings. Some devices can provide data from Good Laboratory Practices (GLP), such as the date, time, and calibration and logged data. This feature enables your readings to be traceable. Also, some devices come with a ‘CAL Check’ feature, which is involved in the diagnostics of the meter’s electrode. A lot of portable meters also have a ‘help’ button in case you’re unsure of how to properly use them.
How to Test Soil pH With a Strip Test Kit
You can purchase pH strip test kits online or from your local garden center. Make sure to take multiple samples and observe the results of each one under the same lighting to ensure consistency and accuracy with this method.
1. Dig Up a Soil Sample
Using a trowel or similar tool, dig into your soil. Dig about 2 to 4 inches deep for soil under annuals and grasses. For trees, bushes, or woody perennials, dig to about 6 to 12 inches. Dig up the soil to use as your soil sample.
2. Clean Soil Sample of Debris
Take your soil sample and place about 1 to 3 teaspoons worth into a clean glass. Remove any debris like sticks and stones so you’re left with a clean sample of soil.
3. Add Distilled Water to Soil Sample
Fill the glass containing your soil sample with distilled water, adding it to the same level as the soil. The water must be distilled to ensure the results of the test are accurate.
4. Mix Soil Sample
With vigor, stir or swirl the water and soil mixture for a few minutes. After you’ve done this, leave the mixture to rest for about half an hour.
5. Filter Soil Sample
Take your soil sample mixture and pour it through a coffee filter into a second clean glass. Make sure that all of the solid material is filtered out, leaving only the liquid in the glass.
6. Dip pH Test Strip into Sample Liquid
Take your pH test strips and dip one into the liquid made from the soil sample. Refer to the instructions for your chosen test strips for the exact amount of time you should leave the strip in the sample.
7. Assess pH Level of Sample
Observe the color that the pH test strip turns and compare it against the chart provided with the strips. This will reveal the pH of your soil sample.
8. Repeat Process
Take several more samples of soil from different parts of the planting area and repeat this process for each sample. Add up your readings and divide this number by the number of readings you took to find the average pH of your soil.
How to Test Soil pH With a Chemical Soil pH Test
These test kits are widely available to purchase online or from your local garden center. They often come with four different reagents to enable you to test the nitrogen (N), phosphorus (P), and potassium (K) levels in our soil, in addition to its pH.
1. Dig Up a Soil Sample
Use a trowel or similar tool, dig into your soil. For soil under annuals and grasses, dig to a depth of 2 to 4 inches. For trees, bushes, or woody perennials, dig a little deeper to 6 to 12 inches. Dig up some soil to use as a soil sample.
2. Clean Soil Sample
Clean the soil sample by removing debris such as stones, twigs, or roots.
3. Add Soil Sample to Tube
Add your soil sample to the tube provided with the chemical pH testing kit.
4. Add Reagent to Tube
Take the chemical reagent that came with your kit and add it to the tube containing the soil sample. Make sure to use the correct reagent for pH; your kit will likely come with several different tubes that you can use to test for different elements.
5. Add Distilled Water to Tube
Add distilled water to the tube containing your soil sample and reagent, filling the tube to the fill line. Make sure to use distilled water to ensure an accurate reading.
6. Shake Tube
Place the cap onto the tube and shake the tube vigorously for a few minutes. Then, leave it to settle until the color starts to develop in the mix.
5. Assess pH Level of Sample
Compare the color of the mixture in the tube against the corresponding chart provided with the kit. The color will reveal the pH level or nutrient level, depending on what you’re testing for.
6. Repeat Process
Repeat this process by taking several more samples from other parts of the planting area. Find the average of all of your readings; add them together and divide that figure by the number of readings you took.
How to Test Soil pH With a Soil Meter
This process will vary between kits, so check the instructions on your chosen device for exact directions. Most kits will involve the following steps.
1. Dig Small Hole in Planting Area
Take a trowel and dig a small hole in the planting area to a depth of about 2 to 4 inches. Remove any debris from the hole like twigs or stones.
2. Fill Hole With Distilled Water
Fill the hole you dug with distilled water. Using distilled water ensures an accurate reading.
3. Insert Probe into Hole
Insert the test probe into the hole once the water has muddied.
4. Look at Reading Displayed on Screen of Meter
After about a minute, you should be able to see the reading on the screen of your meter. Depending on your device, you may be able to find out nutrient and moisture levels in the soil in addition to its pH level.
5. Clean Meter
Once you have finished using the meter, remember to clean off any particles of leftover soil. Ensure it’s completely dry before storing it away.
How to Test Soil pH Without a Test Kit
It’s possible to get a rough idea of the pH level of your soil without a test kit using materials found around your home. All you need is a trowel, a couple of containers, vinegar, baking soda, and some distilled water. This method is the least accurate of all your options, but it will give you a rough idea of whether your soil is more acidic or alkaline.
1. Dig Up Soil Sample
Use a trowel to dig 4 to 6 inches deep into the soil in the planting area and remove a sample. For the best results from this method, take samples from several different parts of the planting area and combine them to create a ‘blended sample’.
2. Clean Soil Sample
Clean the soil sample so it doesn’t contain any debris like sticks or stones. Break up any larger clumps of soil.
3. Divide Soil Sample into Two Containers
Take two containers made of a non-reactive material, i.e. glass or plastic, and divide the soil sample between them.
4. Add Water to Soil Samples
In their containers, add ½ cup of distilled water to each soil sample. Stir each mixture until it becomes a well-combined muddy slurry.
5. Add Vinegar to Sample #1 to Test Alkalinity
Take your first container and add in ½ cup of vinegar. If the mixture starts to fizz, foam, or bubble, it has an alkaline pH and falls in the 8 to 14 range. What you’re witnessing is the chemical reaction that occurs when an acid and an alkaline come into contact with each other. The more that the mixture fizzes, the more alkaline the soil is.
6. Add Baking Soda to Sample #2 to Test Acidity
Take your second container, this time adding in ½ cup of baking soda. If this solution starts to fizz, foam, or bubble, it has an acidic pH, falling into the 1 to 6 range. Again, the reaction you can see here is the result of an alkaline substance coming into contact with an acidic one. As most soils in the US are slightly acidic, it’s highly likely that some amount of fizzing will occur. If there is a fervorous reaction, this indicates that your soil pH is very low, i.e. highly acidic.
How to Adjust Soil pH
Once you have determined the pH of your soil, you can decide whether you need to raise or lower it depending on the plants that you’re trying to grow. There are a number of materials you can add to your soil to get it into an optimal pH range.
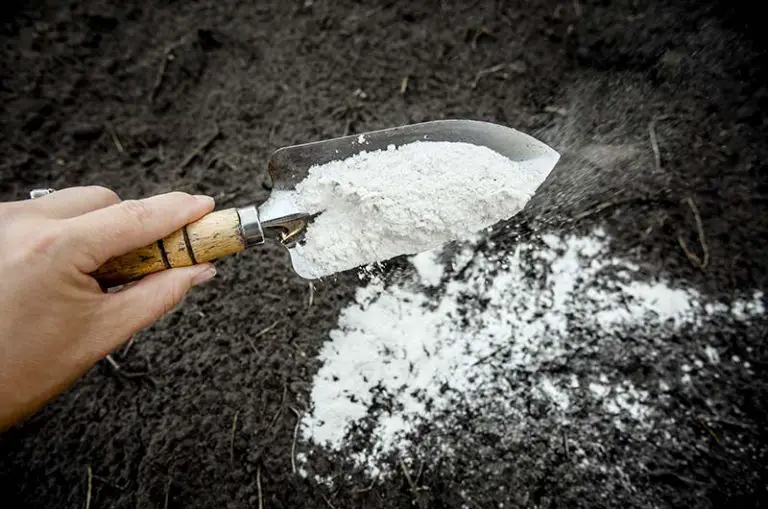
Materials that Lower Soil pH
- Elemental sulfur (flowers of sulfur)
- Aluminum sulfate
- Iron sulfate (ferrous sulfate)
- Compost tea
- Coffee grounds
- Sphagnum peat moss
Materials that Raise Soil pH
- Pulverized limestone (garden lime)
- Pelletized pulverized limestone
- Dolomitic limestone
- Wood ash
- Baking soda
We have provided an extensive list of these materials in our article How to Raise and Lower Soil pH, along with a step-by-step method of how to incorporate them into your soil.