How to Raise and Lower Soil pH
The pH level of your soil is one of the many environmental factors that can have a significant impact on the growth and health of your plants.
Most soils in the US are slightly acidic, and most plants are able to thrive at this pH. However, some soils can be higher (more alkaline) or lower (more acidic) on the pH scale and may need to be adjusted depending on the type of plants you’re trying to grow.
Read on to learn more about the importance of soil pH and the different materials you can use to raise or lower the pH of your soil. In this guide, we have also provided a step-by-step method on how to raise soil pH and lower soil pH with your chosen material.
What is Soil pH and Why Does it Matter?
Soil pH has a direct effect on how available the soil’s nutrients are to the plants growing in it. These essential nutrients fall under three categories: primary, secondary, and micronutrients.
Primary nutrients are those which are needed by plants in the largest quantities compared to the others. The primary nutrients needed by plants are nitrogen (N), phosphorus (P), and potassium (K). Secondary nutrients are needed in smaller quantities but are just as essential for plant growth, and these include calcium (Ca), magnesium (Mg), and sulfur (S). Micronutrients like zinc (Zn) and manganese (Mn) are also needed by plants, but in very small amounts compared to the others.
To briefly explain the pH scale, it is a scientific spectrum used to measure whether a substance is acidic, alkaline, or neutral. The scale uses numbers to identify where the substance in question falls on the spectrum, which ranges from 0 to 14. If a substance is neutral (e.g. water) it is said to have a pH of 7 and is neither acid nor alkaline, while pH levels between 0 to 7 are classed as acidic, and pH levels of 7 to 14 are classed as alkaline.
These vital nutrients are readily available to the majority of plants that are in soil with a pH of roughly 6 to 7.5, so most plants will have no trouble growing in this soil with this pH level. However, there are a few plants that are a bit more particular with the type of soil that they thrive in, with some preferring slightly more acidic soil, and some alkaline. Plants that are in the wrong soil pH will suffer from nutrient deficiencies and may see less vigorous growth.
Soil that is on an extreme end of the pH scale, either being too acidic or too alkaline, will have a significant impact on plants. In soils that are low on the pH scale (highly acidic), aluminum and manganese can become more readily available and more toxic to plants. On the other hand, soils that are too high on the scale (highly alkaline) will make calcium, magnesium, and phosphorus become less available to the plant. Additionally, if the soil pH level reaches 6.5 or higher, it reduces the availability of phosphorus and the majority of micronutrients to the plants.
Soil pH for Grass Types
Refer to the table below to find out the ideal pH ranges for each grass type.
| Grass Type | Lowest pH | Highest pH |
| Bahiagrass (Argentine, Pensacola, Tifton-9) | 6.0 | 7.5 |
| Bentgrass (Colonial & Creeping) | 5.6 | 7.0 |
| Bermuda (Hybrids & Common) | 5.6 | 7.0 |
| Bluegrass | 5.7 | 7.4 |
| Buffalo | 5.6 | 7.0 |
| Carpetgrass | 6.0 | 8.0 |
| Centipede | 4.3 | 5.8 |
| Fescue (Red & Creeping) | 5.6 | 6.8 |
| Fescue (Tall) | 5.6 | 7.0 |
| Rye Annual | 5.8 | 7.4 |
| Perennial Rye | 5.8 | 7.4 |
| St. Augustine | 6.3 | 7.8 |
| Zoysia | 5.5 | 7.0 |
Factors that Affect Soil pH
The main factor that determines soil pH is the way in which the soil was first formed. Soil is created when dead and decomposing leaves, branches, and other plant waste combines with mineral-containing rocks, sometimes referred to as the ‘parent material’, which forms the chemical basis of the soil. The type of rocks that were involved in the formation of the soil will cause it to either be acidic or alkaline. For instance, soil that was formed in an area that has a large presence of natural limestone will be naturally alkaline. In areas that have a large amount of granite rock the soil will be neutral, but if the environment also supports large sources of humus, such as evergreen trees, the soil will be more acidic.
Other environmental factors that can have an effect on soil pH include water, heat, and bacterial activity. Soils that are formed in areas with high rainfall tend to be more acidic than those formed under dryer conditions. Some soils may have a lower pH level due to soil organisms, as they work continuously to decompose organic matter, and in doing so they release hydrogen ions which can cause the soil to become more acidic. Generally speaking, the pH of soil will fluctuate seasonally due to these environmental factors. Soil pH will usually rise by half a point throughout the year, for instance, it can become more alkaline (pH level 6.0) in cool weather, and more acidic (pH level of 6.5) in warm weather.
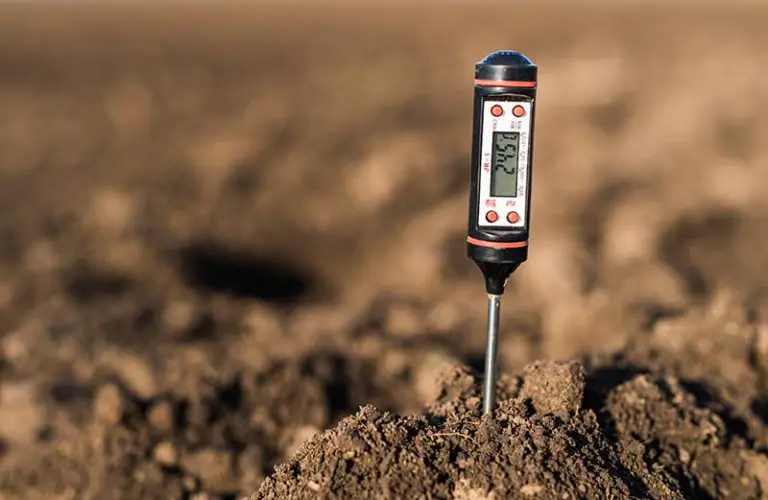
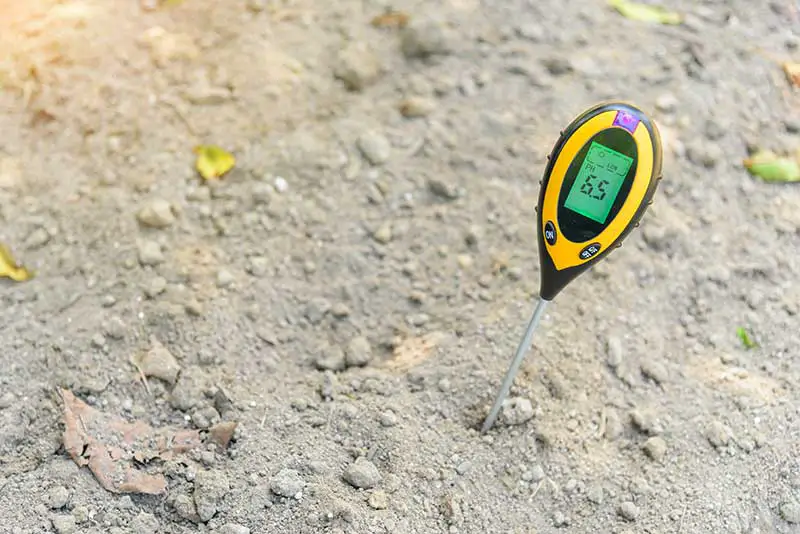
How to Test Soil pH
To find out whether your soil is more acidic or alkaline, you should carry out a soil pH test. This can be done in a number of ways discussed in more detail below, and from the results, you will be able to adjust your soil’s pH level accordingly and remedy any nutritional deficiencies that your plants may be suffering from. The ideal season to conduct a soil pH test is in the fall, but you can do it any time of the year if you notice that your plants are looking unhealthy for no other obvious reason.
The first option available for you to go about conducting a soil pH test is to buy a soil testing kit, which can be easily obtained from your local garden center. These soil testers can provide you with reasonably reliable results, but the results may vary from one kit to the next. This option may not provide much in the way of thorough detail, but it is a cheap and quick method of finding out some basic information on the pH and nutrient levels present in your soil.
Alternatively, if you’re looking for a more detailed and accurate analysis of your soil, you can send a soil sample to your local county extension office. They will provide you with instructions on how to collect the soil sample, and then they will test it and get back to you with a soil analysis. This process will either be free or very low cost.
If you don’t mind spending a little more, you can send your soil sample to a private testing laboratory that performs plant tissue and soil testing. Although these are more costly, you will receive a more detailed analysis, and you may even be able to see information on the levels of micronutrients in your soil such as calcium, copper, iron, zinc, magnesium, and manganese.
How to Lower pH in Soil
When to Lower Soil pH
You may need to lower soil pH if you live in an area of naturally alkaline soil, or if you’re trying to grow acid-loving plants such as ornamental plants and fruit plants. The problem with soil that’s too alkaline is that high pH values can affect the availability of essential nutrients in the soil needed by plants, including zinc, copper, iron, and manganese. High soil pH values can also cause issues with the availability of phosphate, which is an important macronutrient for plant health.
Most acidifying materials can be applied to your soil at any time throughout the year to lower soil pH. Those containing sulfur are best applied from spring to fall as they take longer to work if they’re in cold soil.
Materials that Lower pH in Soil
Elemental Sulfur (Flowers of Sulfur)
Sulfur is a very common material used to lower the ph level of soil, but there are a few different forms of the substance that behave in different ways. Elemental sulfur is the cheapest and safest acidifier and is also organic, however, it is one of the slowest acting methods of lowering soil pH.
After it’s been applied, soil organisms convert the sulfur into sulfuric acid, which in turn acidifies the surrounding soil. The rate at which soil organisms carry out this process depends on how fine the sulfur is, the level of soil moisture, the temperature of the soil, and the presence of the organisms.
Due to all of these variable factors, sulfur will acidify the soil at a slower rate, usually taking weeks to act. It may even take several months to do its job if the conditions are suboptimal, e.g. during the cold of winter. The more finely ground the sulfur is, the more quickly it can be converted by bacteria. This is why sulfur dust works more quickly than sulfur chips and is also more expensive.
Aluminium Sulfate
Aluminum sulfate works instantly to lower the pH level of soil. This is because it will produce acidity as soon as it has dissolved in the soil, meaning it’s an effective solution if you’re looking for the fastest way to lower soil pH.
When it comes into contact with water, the aluminum sulfate forms both aluminum hydroxide and a diluted solution of sulfuric acid, which then acts to lower the soil pH level. It has an instant effect, but applying large quantities may reduce the pH level too excessively and can interfere with levels of phosphorus in the soil. Also, applying it repeatedly may cause a toxic build-up of aluminum in the soil.
In addition to lowering soil pH, aluminum sulfate is used by gardeners growing hydrangeas, or in commercial hydrangea ‘blueing agents’, when the soil conditions aren’t sufficiently acidic to naturally give the hydrangeas their vibrant shade of blue.
Iron Sulfate (Ferrous Sulfate)
Iron sulfate works in a similar way to aluminum sulfate, rapidly lowering the soil pH as soon as it’s applied. It also enriches the soil with iron, which is a micronutrient needed by plants.
Iron plays a key role in the production of chlorophyll in plants, which supplies them with oxygen and gives them their green color. This is why when your soil is suffering from iron deficiency, known as ‘iron chlorosis’, your plants will start to yellow. Alkaline soil binds up the iron particles making them unavailable to plants, so if you think your plants are experiencing iron deficiency then you may need to acidify and enrich your soil with iron sulfate.
If iron sulfate is used in too large quantities, it may negatively affect the availability of phosphorus to the plants. This problem can be solved with the application of a phosphate fertilizer upon the completion of the acidification process.
Compost Tea
Compost tea is an excellent organic solution to lower soil pH, and is an effective way to feed your plants with essential and fast-acting nutrients.
You can easily make your own compost tea at home. Fill a five-gallon bucket with water then remove any chlorine from it by letting it sit in the sun for 24 hours. Then, take some well-decomposed compost and dump it into the bucket of water, using a ratio of about 1 to 2 cups of compost per gallon, and steep it well by stirring it periodically over the next 48 hours. Separate the soil and the liquid by straining it, then pour the liquid into a sprayer or watering can. Water your garden with the liquid, and use the solids by working them into the drip line of the plants.
Mulch
Adding mulch is another organic method of lowering soil pH, which you can either purchase from your garden store or make yourself at home.
Organic mulches are made of dead plant matter which can be leaves, compost, grass clippings or bark. This organic material in mulch breaks down over time, which helps to acidify soil in the process. Mulches that contain oak leaves or pine needles are the best types to give soil a boost in acidity. In addition to its pH-changing properties, organic mulch is also beneficial as it can reduce soil erosion, regulate soil temperature, help the soil to retain moisture and enrich it with beneficial nutrients.
Coffee Grounds
Coffee grounds can be added to soil to acidify it, and are another organic way to lower soil pH that reduces waste and can also provide a boost of nutrients to your plants.
The coffee grounds will break down over time and contribute to the acidity of the soil they’re in. They have also been found to contain a substantial amount of nitrogen, as well as smaller amounts of phosphorus and potassium and a few other micronutrients.
Sphagnum Peat Moss
Peat moss can be added to your lawn to help gradually lower soil pH. It’s very easy to incorporate into soil and makes a great soil amendment for grass that’s too alkaline.
To apply sphagnum peat moss, just add 2 to 3 inches of it to the top layer of soil and then work it further down into the lower levels of topsoil. See our guide for further information on using peat moss on an overseeded lawn.
Although applying peat moss has been found to lower soil pH, it has decreased in popularity in the past few years as it is too costly a method for owners of expansive gardens, and has been criticized for being environmentally unfriendly. This is because it comes from a source that isn’t highly renewable, and its harvesting process may negatively contribute to global warming.
How to Raise pH in Soil
When to Raise Soil pH
You will most likely need to raise your soil pH if you live in an area that has soils that are naturally acidic. Acidic soil can be caused by a high presence of aluminum or manganese, which is toxic to plants in excessive quantities. Calcium and magnesium deficiencies in the soil can also be a reason for low soil pH and they too can create issues for plants, while large amounts of iron and aluminum can tie up phosphorus, which will also result in highly acidic soil.
Materials that Raise Soil pH
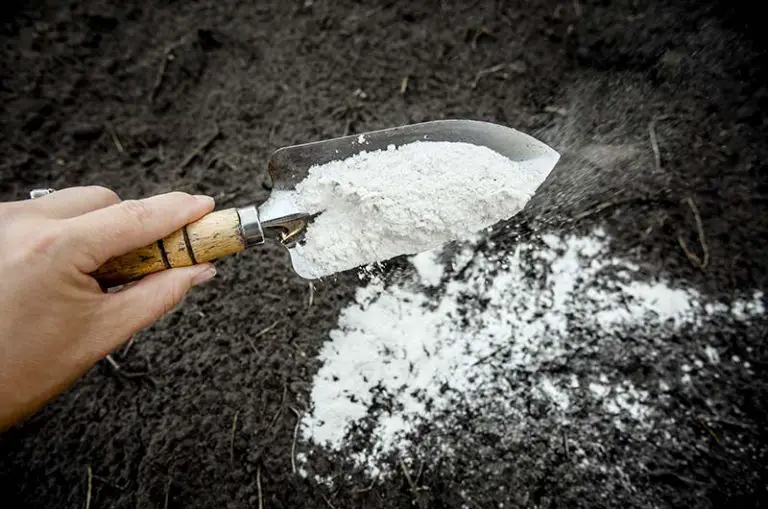
Pulverized Limestone (Garden Lime)
Pulverized limestone is made by grinding down limestone into a fine powder. This is the most common and least expensive way to neutralize acid and raise pH in soil, and also acts as a source of calcium.
As it is made up of calcium carbonate, pulverized limestone provides a source of calcium for your soil and plants, in addition to raising the soil pH. With that said, you should never apply pulverized limestone to soil that already has an ideal pH just for the sake of the calcium, as an overload of the substance could cause more problems than it solves. Soil that’s too alkaline can be just as harmful to plants as soil that’s too acidic, so make sure that you don’t overapply the limestone.
Pelletized Pulverized Limestone
Pelletized Pulverized Limestone is a pelleted form of regular pulverized limestone. It’s slightly more expensive than its powdered form, but it’s the cleanest, least dusty and easiest-to-use form of limestone.
To make limestone into this pelletized form, the limestone rock is ground into a powder before being granulated. As the limestone is ground into such a fine consistency during this process, pelletized limestone will dissolve very quickly and start working to raise pH in soil fast.
Dolomitic Limestone
Dolomitic limestone is made from pulverized dolomite. This form of limestone will raise pH in soil effectively and will enrich the soil with magnesium as well as calcium.
Dolomitic limestone differs from regular limestone as it contains both calcium carbonate and magnesium carbonate. Although magnesium isn’t classed as one of the most vital primary nutrients, it’s an important secondary nutrient that plays a key role in plant growth and health. You can find out whether your soil needs a boost of magnesium with a soil test kit, or by sending a soil sample to a testing laboratory. If the test shows you have acidic soils along with low levels of magnesium, you can remedy it by applying dolomitic limestone.
Tip: If you’re a pet owner, you should take care when using lawn lime as it can be potentially harmful to your pet if they ingest it or part of their body comes into contact with it. Refer to our article Does Lawn Lime Hurt Pets for more information and safety advice on this.
Wood Ash
Wood ashes are an organic solution to raising soil pH. They contain substantial amounts of calcium and potassium, as well as small amounts of phosphate, boron, and other elements.
Even though this method isn’t as effective as using limestone, wood ashes can drastically raise pH in soil with repeated applications, particularly if the soil has a sandy texture. To use wood ashes most effectively, you should spread a fine layer across soil in the winter, then incorporate it into the soil during the spring. Make sure to check the soil pH annually, and avoid using excessive amounts of wood ashes as this can cause the soil pH to become too high. Never use coal ashes, as they provide no lime value and may actually acidify the soil depending on the source.
Baking Soda
Baking soda can be applied to soil as a quick and easy method of making soil more alkaline. It is a harm-free way to raise pH in soil, as it’s very gentle on both the soil and the plants.
This method doesn’t last as long as limestone, but it can produce fast results in a matter of days. To apply it, mix baking soda with water using a ratio of one tablespoon of baking soda to one gallon of water. Take care not to add too much baking soda into the mixture, and try not to overuse the mixture in your garden. You should repeat this process every few months and test your soil to ensure you’re maintaining the optimal soil pH.
How to Adjust Soil pH (Step by Step Method)
1. Carry out a soil test
You should first find out what your current soil pH level is, in order to determine how much you need to raise or lower the pH. You can buy a soil testing kit from your garden center, which provides reasonably accurate information on the pH and nutrient levels of the soil. For a more detailed analysis, you can collect a soil sample and send it off to your local county extension office or a private testing laboratory.
2. Decide which pH-adjusting material suits your needs
After finding out whether you need to raise or lower your soil pH, look into the various options of organic and inorganic materials that have pH-changing properties. Take into consideration factors such as the amount that you need to adjust your pH level by, the type of soil in your area, and any nutritional deficiencies that your soil is suffering from.
3. Till the pH-adjusting material into your soil
When you have chosen the best material to adjust your soil’s pH, measure it out according to your needs and garden size. Use a rake, shovel, tiller, or another similar tool to thoroughly till your material of choice into the soil. For best results, make sure that the material is mixed well into the top 6 inches of soil.
In the case that you accidentally apply too much lime during this step, refer to our article Can You Put Too Much Lime on Your Lawn? (And How To Fix It!).
4. Water the area thoroughly
Water the area thoroughly, so that the water has permeated through the soil to a minimum depth of 6 inches. This ensures that the pH-adjusting material will become activated and get to work as soon as possible. You should regularly water the soil, but try not to overwater, as this could leach essential nutrients and minerals from it.
5. Re-test soil pH level every few months
Remember to test the soil every few months to monitor the status of the soil pH. By keeping an eye on how it fluctuates, you can learn whether you used the correct amount of your chosen material, and find out if it’s still working or if it’s time to carry out a reapplication.