How to Add Calcium to Soil
In the same way that human bodies need calcium to have strong healthy bones and to carry out a range of internal functions, plants need calcium to provide structure to their foliage and to send signals from one part of the plant to another. Without enough readily available calcium, plants will suffer stunted growth along with unhealthy foliage and fruits.
There are several substances that add calcium to soil and that can be applied directly to the plants, including gypsum, lime, store-bought and DIY foliar sprays, and bone meal. The key to determining which of these materials you should apply lies with carrying out a CEC and pH test on your current soil.
Read through our guide to learn everything you need to know about adding calcium to soil, as well as some guidance on the different materials you can use to achieve this goal.
Why Do Plants Need Calcium?
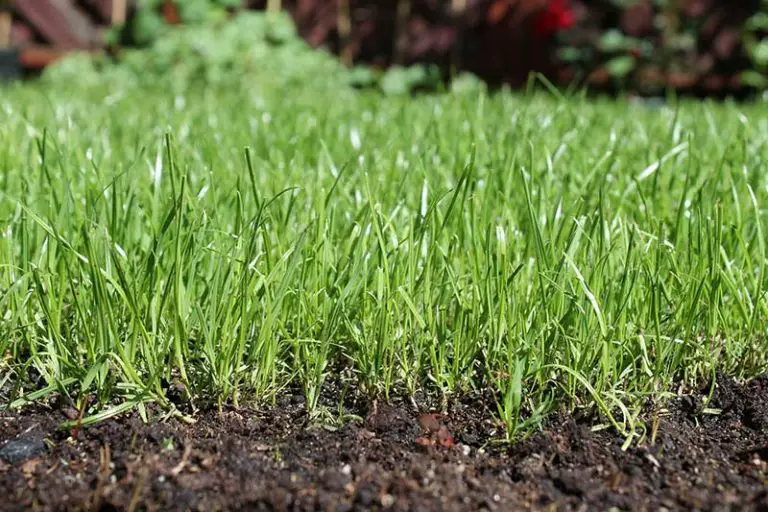
All plants and grasses need a range of nutrients in order to grow healthy, strong foliage that’s resistant to stress and disease. In total, there are 16 essential plant nutrients that all work together to keep plants in a good condition. The three nutrients needed in the highest amounts are nitrogen (N), phosphorus (P), and potassium (K) and are known as primary nutrients. Beyond these three primary nutrients, there are several secondary macronutrients that are needed in lesser amounts, but are just as important to the health of grasses and plants. These secondary nutrients include magnesium, sulfur, and calcium.
Structural Functions
The main role that calcium plays in plants is that it’s responsible for holding the cell walls of plants together, providing structure to the cell walls and membranes. For this function, the calcium must be in the form of calcium pectate. Without calcium, any new tissue that the plant tries to create such as root tips, shoot tips, and young leaves will most likely see distorted growth due to the improper development of cell walls. Having sufficient amounts of calcium means that the plants will grow properly without dying or withering.
Signaling Functions
Plants also use calcium to activate certain enzymes and to coordinate certain cellular activities by sending signals around the plant. It provides transport for other minerals, and may also work to counteract alkali salts and organic acids within the plant. Calcium also helps to maintain pH levels within the plant as well as increasing the plant’s resistance to disease.
Which Plants Need Calcium the Most?
Calcium is needed in some amounts by all plants, but there are some types that have a particular requirement for this nutrient to be in abundant supply in the soil.
Fruit and Vegetables: Apples, broccoli, brussel sprouts, cabbage, cantaloupe, carrots, cauliflower, celery, cherries, grapes, legumes, lemons, lettuce, limes, peaches, peanuts, pears, peppers, tomatoes, watermelon.
Other Plants: Conifer trees, cotton, tobacco.
What Causes Calcium Deficiency in Plants?
At face value, you may think that a deficiency in calcium simply means that there isn’t enough calcium present in the soil for the plants to take in. While this is true, plants can suffer from the effects of a calcium deficiency as a result of a number of factors such as soil pH, an incorrect nutrient balance in the soil, and the plant’s transpiration rate.
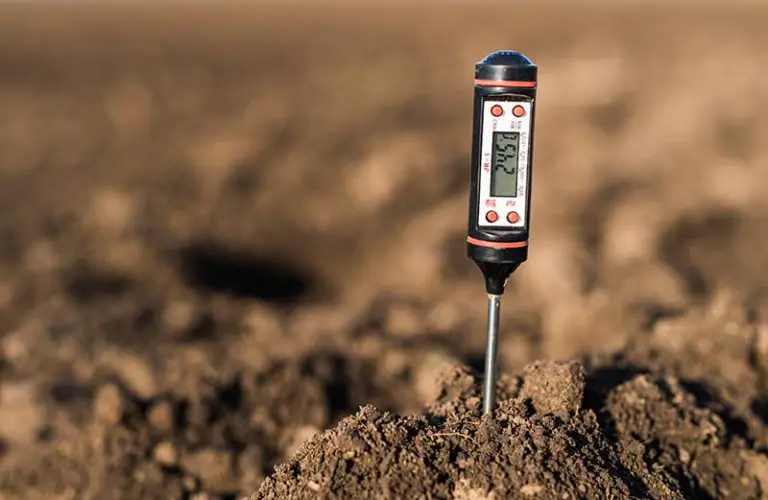
pH Level of Soil
Calcium deficiencies in plants are directly affected by the pH of the soil. If your soil is below a pH level of 6.0, i.e. if it’s highly acidic, plants have a harder time taking up calcium regardless of the amount of the nutrient present in the soil.
Nutrient Balance in Soil
Calcium is defined as a cation, meaning it’s a positively charged ion. It requires negatively charged sites on clay and organic matter particles in order to bond with the sites and be taken up by plants. This is the case for several other elements in soil, including magnesium, potassium, sodium, aluminum, and manganese. If there is an over-abundance of one or more of these elements, the negative ions become oversaturated, thus blocking other important nutrients such as calcium from being taken up by the plants.
Transpiration Rate of Plants
The transpiration rate of plants refers to the plants’ process of taking in water through their roots, then cycling the majority of this water back into the atmosphere by evaporating it off of the plants’ tissues such as leaves and flowers. To put this into the context of calcium availability, calcium is only able to move throughout the plant via xylem; xylem are dead cells that are only able to transport water in one direction – upward – through the plant. As the plant evaporates water through its leaves and flowers, a sort of suction action occurs to draw more water back up into the plant. Therefore, if the transpiration rate is low, less water is being drawn through the plant, which in turn means that less calcium is being drawn through the plant too. Low transpiration rates can be caused by inadequate watering, high levels of humidity, and cold temperatures.
When to Add Calcium to Soil
Signs of Calcium Deficiency
Before you go through the process of testing your soil, you can spot some visible telltale signs that indicate your plants aren’t getting enough calcium. These include:
- Stunted or weak growth of new foliage
- Stunted bud growth
- Curling of young leaves or shoots
- Scorching or spotting of young leaves
- Burnt leaf tips
- Cupping of mature leaves
- Chlorosis/yellowing of leaves
- Fruit damage (e.g. blossom end rot on tomatoes or bitter pits in apples)
Calcium is classified as an immobile nutrient, meaning that once it has reached a certain part of a plant it will remain there. For instance, if the plant grows new foliage in soil that has become insufficiently low in calcium, other older parts of the plant which have enough calcium are unable to send some of the nutrient to the new growth. For this reason, the signs of a calcium deficiency will show up in new growth before they become noticeable in older tissue.
How to Test Soil for Calcium
For many nutrients, the testing process is straightforward and only requires a reading of the level of the nutrient present in the soil to get an idea of whether your plants are lacking in any particular one. Finding out the amount of the main primary nutrients (N, P, K) present in soil can be done yourself with a simple at-home soil testing kit. However, the process is a little more complex when testing soil for calcium availability, as the amount of calcium present in the soil doesn’t actually reflect how much of the nutrient can be taken up by the plants.
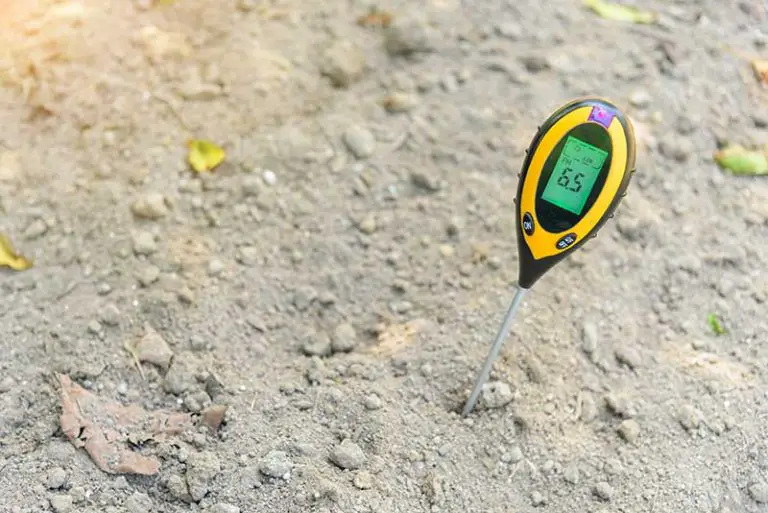
CEC and pH Testing
Instead of testing the soil merely for the presence of calcium, it needs to be tested to find out its Cation Exchange Capacity, or CEC.
In technical terms, the CEC is a measure of the soil’s relative ability to absorb and retain nutrients such as magnesium, potassium, and calcium in the form of cations (which is another term for positively charged ions). To understand this better, imagine the soil as a storage tank for these nutrients; the CEC is a measure of how readily the storage tank is able to supply plants with the nutrients that it contains.
In addition to testing the CEC level, the pH level of the soil must also be tested, as it is a crucial factor in nutrient availability and has a direct effect on the CEC level. This is because as the pH increases, i.e. as the soil becomes less acidic, the number of negative charges in the soil increases. What this means in terms of calcium is, the higher the pH of the soil, the higher the availability of calcium.
Both the CEC level and pH level of your soil can be accurately measured by having a sample of the soil tested at a professional testing laboratory. A higher CEC measurement indicates a higher amount of organic matter and clay present in the soil; this is a good sign, as this kind of soil is better at retaining water and nutrients such as calcium compared to sandy soil. A lower CEC measurement suggests that the soil is more sandy; this means that the soil is more likely to suffer from nutrient deficiencies as a result of leaching, which is due to the soil’s inability to hold onto the nutrients and water the same way that clay-heavy soil does.
The results of a professional soil test will give you an idea of what materials need to be added to your soil to increase its CEC and get it into optimal condition for growing plant life. You may need to add matter such as an organic fertilizer or soil amendment to replenish any missing nutrients from the soil and improve its overall condition. If the pH level is incorrect, you will either have to raise it, which is most commonly achieved by adding sulfur, or lower it, which is most often done by adding lime. By increasing the CEC level and adjusting the pH to be within the optimal range for your plants, you can significantly improve the availability of calcium in your soil.
How to Add Calcium to Soil
1. Add Gypsum
If your soil pH test indicates that the pH of your soil is already within an ideal range, then you should choose to add gypsum – it will give your soil a boost of calcium without raising or lowering the soil’s pH. With gypsum in particular, its chemical formula makes the calcium it contains more readily available to plants when compared with other sources of the nutrient.
An additional benefit of gypsum over other sources of calcium is that it’s classified as a moderately-soluble mineral; this means that the calcium is able to move further down into the soil as opposed to the calcium that comes from lime. This causes plants to develop deeper and more extensive root systems, which enhances their ability to retain water and nutrients, thus improving their ability to withstand periods of drought or stress.
How to Add Gypsum to Soil:
The exact amount of gypsum that you use will depend on the size and needs of the area that you’re amending. For smaller areas, you can use your hands to spread the gypsum around the soil or plants you wish to amend – remember to wash your hands before and after application. For larger areas, pour the bag of gypsum into a soil spreader and then use the spreader to place it carefully and evenly over the surface of the soil. You should then water the soil to enable the gypsum to be more easily absorbed. You may need to repeat this process annually.
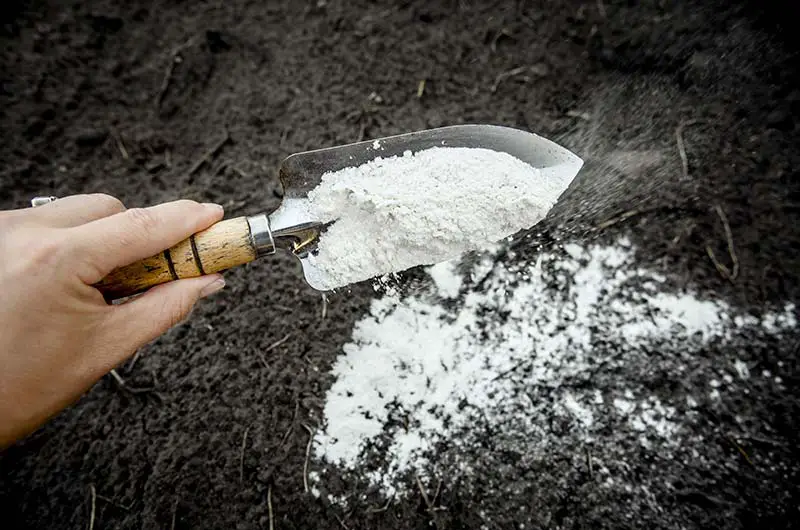
2. Add Lime
If your soil pH test reveals that your pH level is too low, i.e. too acidic, then lime is the best option to both raise the pH level and increase the amounts of available calcium (and magnesium) with the application of one material.
How to Add Lime to Soil:
The exact amount of lime you use in your application will depend on the size of the area and by how much you intend to raise the pH level. For smaller areas, apply the lime by hand, remembering to wash your hands before and after application. For larger applications, you can spread the lime using a soil spreader. Regardless of the method of application, it’s recommended that you till the soil using a tiller to make sure that the lime is distributed evenly throughout the surface of the soil. This application may need to be repeated annually to see the continued benefits of the lime.
If you accidentally over-apply the lime, refer to our guide Can You Put Too Much Lime on a Lawn to prevent any damage to your plants.
3. Use a Store-Bought Foliar Spray
Plants are able to take in calcium through their foliage in addition to through their roots, so you can use a foliar spray to apply the calcium directly onto the parts of the plant that need it most. Pre-made foliar sprays rich in calcium can be easily purchased and applied to your plants to give them a boost of calcium as and when necessary. Many of these sprays will also be formulated to contain other essential nutrients such as magnesium and iron in the case that your plants could also use a boost of these nutrients.
4. Create a DIY Calcium Foliar Spray
Note: When making any DIY homemade sprays, you should always test the mix first on a small portion of the plants you intend to apply it to in order to make sure that the mix won’t damage your plants. Also, you should never apply these sprays to plants on a hot or bright sunny day, as this will most likely lead to the plant becoming burnt and/or dying off.
If you’d rather go down the organic DIY route, you can formulate your own organic calcium-rich foliar spray using materials from around your home or garden.
How to Make Foliar Spray from Eggshells:
In addition to calcium, this spray will also be enriched with nitrogen, magnesium, phosphorus, and collagen, which are all key nutrients in the healthy growth of plants.
Place 20 eggs in a pan along with 1 gallon of water. Bring the eggs to a rolling boil, then remove the pan from the heat. Leave the eggs in the water and set it all aside for 24 hours to let the whole thing cool down. After 24 hours, strain the water to remove any solid egg fragments, then place the mixture in an airtight container to be stored in a cool, dry place.
An alternative method to make this spray is to take a gallon jar and fill it with water and eggshells. Leave the mixture to steep for about a month, after which the eggshells should have dissolved into the liquid. Take 1 cup of this resulting solution and dilute it with 1 quart of water, placing the new mixture into a spray bottle.
How to Make Foliar Spray from Seaweed:
This spray will be particularly high in bromine and iodine, in addition to containing rich amounts of nitrogen, iron, sodium, and calcium.
If it’s legal in your area and you have access to it, collect some seaweed from the beach. If you’re unable to collect the seaweed yourself, it can be easily purchased from your local garden store. Chop up your seaweed into small pieces, place it into a bucket, then fill the bucket up with 2 gallons of water. Loosely cover the bucket and leave the mixture to steep and ferment. After several weeks, strain the mixture and dilute ⅔ of a cup with one gallon of water to create your spray.
How to Make Foliar Spray from Chamomile:
This spray will act as a source of calcium, potash, and sulfur, giving it the added benefit of protecting your plants from fungal issues.
Take 2 cups of boiling water and pour over ¼ cup of chamomile blossoms or chamomile tea. Let the mixture steep until it has cooled, then strain it and place it into a spray bottle. The resulting solution will keep for a week until it’ll have to be thrown out.
5. Use Bone Meal
Bone meal can be added to soil as an organic fertilizer to give it a boost of both calcium and phosphorus. It comes in either powdered or granular form; the powdered form of bone meal can be dissolved in water to be applied as a fast-release fertilizer, whereas the granular form behaves as more of a slow-release soil additive as it takes longer to break down. The main benefit of bone meal is that it won’t burn any plants if it’s overapplied. It should be noted that in order for bone meal to be effective, the pH of the soil must be at least 7 or higher; carrying out a pH test before application will help you determine whether you need to adjust your soil pH first.
How to Add Bone Meal to Soil:
Note: Bone meal can be dangerous to animals if ingested, so make sure to keep any pets away from it.
Test your soil pH before applying the bone meal as your soil must be at a pH of at least 7 for the meal to be effective. After adding any necessary pH adjusting materials, add the bone meal. Check the label to find out the exact quantities that the meal should be applied in, but to provide a general guideline you should use a tablespoon of meal per square foot or pot of soil. Make sure that the bone meal is tilled or mixed into the top couple of inches of soil to prevent animals from eating it.