How to Fertilize a Lawn
Fertilization is a crucial element of any annual lawn care routine to maintain a lawn full of thick, healthy grass. So, knowing how to fertilize your lawn properly is the key to keeping your grass plants green and thriving.
There are several steps towards fertilizing a lawn, including testing your soil, purchasing the right fertilizer, and preparing your lawn for fertilization, before applying your fertilizer at the correct rate using the right equipment.
Follow this guide to learn when, how often, and how to fertilize your lawn for the best results possible from your fertilization activities. We have also included guidance on how to choose the right fertilizer and spreader for your lawn.
Why is it Important to Fertilize a Lawn?
All plants need sufficient nutrients in their soil to grow strong foliage, including the grass plants on your lawn. The primary nutrients of nitrogen (N), phosphorus (P), and potassium (K), in addition to a number of other micronutrients, are essential for the growth of your grass.
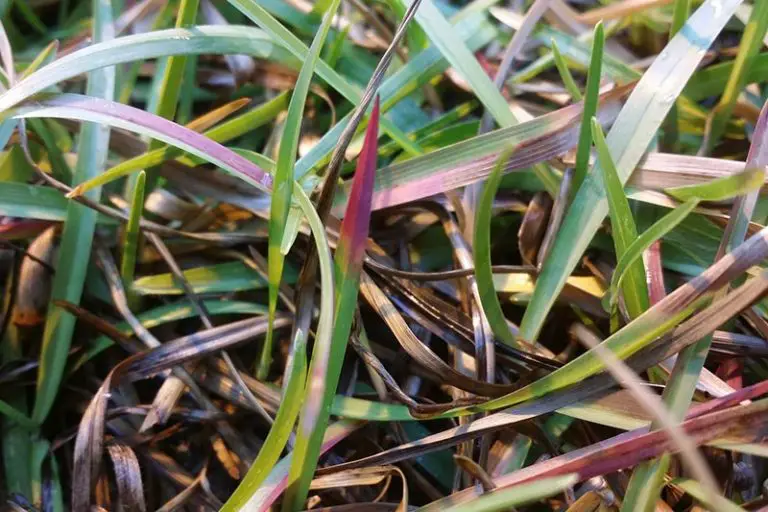
While these nutrients are naturally present in soils, they diminish gradually over time. As the nutrient levels in your lawn decrease, your grass becomes weakened, shriveled, and discolored, turning yellow before dying off. If your soil is lacking nutrients, you won’t be able to cure such issues with watering alone – this is where fertilizer comes into play.
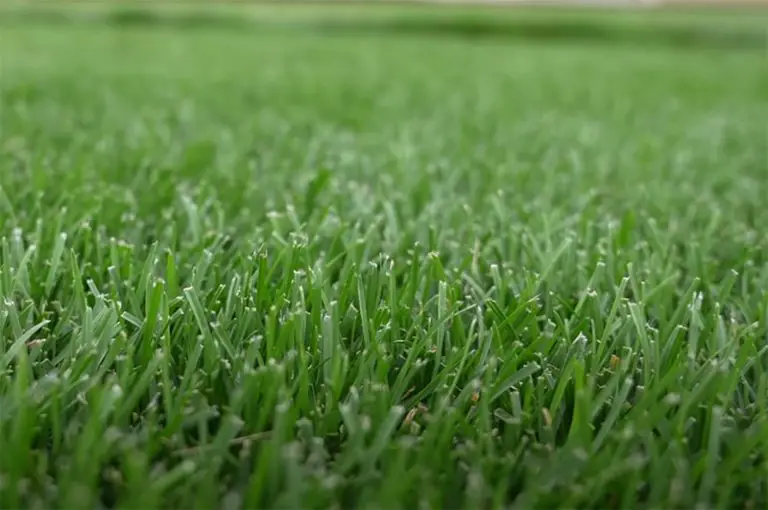
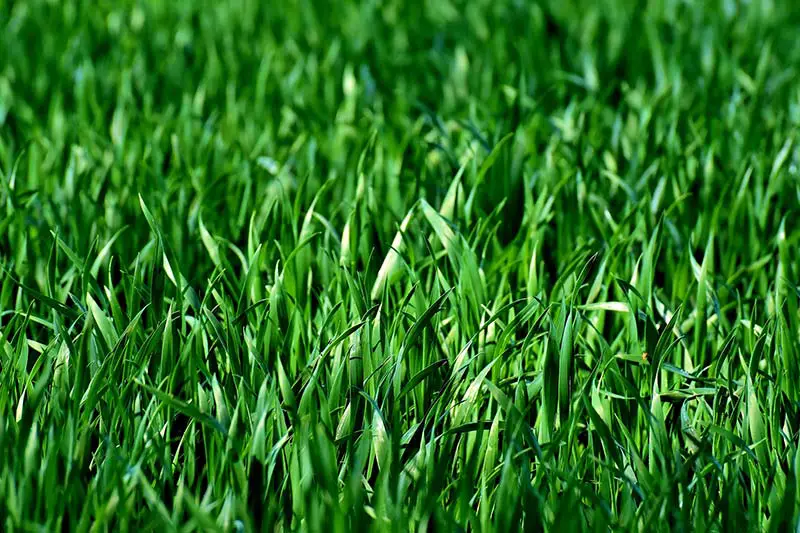
With the addition of fertilizer, you can deliver the nutrients that your grass plants need most to thrive. Not only does it boost the growth of your grass plants, but it also makes your lawn greener, thicker, and more resistant to stress from disease, drought, and frost.
When is the Best Time to Fertilize a Lawn?
The best time to fertilize your lawn is in the early spring, between March and April. The exact best time for your lawn will vary depending on the area that you live in; a better rule of thumb to follow is to fertilize when your lawn’s soil temperatures reach 55ºF.
To keep your lawn in optimal condition, it’s then recommended to fertilize it 1 to 3 more times throughout the year. We have gone through a rough guide of a typical annual fertilization schedule in the following section.
How Often to Fertilize a Lawn
For mature lawns, you should fertilize the grass no more than four times a year. Some lawns will suffice with just two fertilizer applications, but the best practice is to fertilize four times per growing season.
How often you fertilize your lawn will ultimately depend on the climate conditions of the area that you live in. Generally speaking, your annual lawn fertilization activities should follow this rough schedule:
- First application in early spring, when soil temperatures reach 55ºF
- Second application in late spring, between April and June
- Third application in Summer, between June and August
- Fourth application in Autumn, between August and November
For new or overseeded lawns, you should carry out your first fertilizer application as you’re sowing the seed. You can add this first application of specialized starter fertilizer either immediately before or after sowing. Your new seedlings should be established after about 6 to 8 weeks, at which point you can continue with a regular fertilization schedule using regular fertilizer.
Can You Over Fertilize Your Lawn?
Yes, it is possible to over-fertilize a lawn. Applying too much fertilizer, fertilizing too often, or using a fertilizer with an incorrect NPK ratio can all lead to overfertilization. This can have damaging consequences on both your lawn and the local environment.
When it comes to your lawn, the issue with overfertilization is that it puts your grass at risk of fertilizer burn. Chemical fertilizers contain mineral salts that can build up in the soil if you apply the fertilizer too much or too often. A buildup of these salts causes a drying effect in the soil, which in turn causes grass to turn yellow or brown before dying off completely.
In addition to damaging your grass, overfertilization can also damage the surrounding environment. When your lawn has more fertilizer than it needs, it ends up containing excessive amounts of the fertilizer’s chemicals. The next time it rains, these excess chemicals leach into the local environment through runoff, where they cause harm to the nearby plants and wildlife.
Choosing the Right Fertilizer
One of the most crucial elements of the fertilization process is choosing the best fertilizer for your lawn. Between soil types, grass species, and NPK values, it can be a bewildering process to know which fertilizer to choose. We have broken down some of the key aspects of fertilizer that you should understand before making your purchase.
Understanding NPK Values
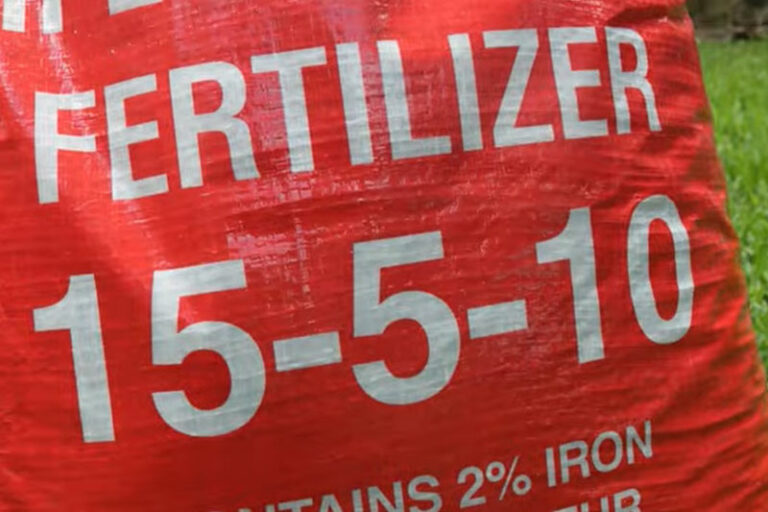
As we’ve already discussed, all plants must have access to sufficient levels of nitrogen (N), phosphorus (P), and potassium (K). These are nutrients that plants need in varying amounts depending on their stage of growth. For example, mature lawns require more nitrogen for strong foliage, while grass seedlings need more phosphorus to promote root development.
The amount of each primary nutrient present in a particular fertilizer is represented by a number known as the NPK ratio. You will find this number on the packaging of your fertilizer. To use a common fertilizer ratio as an example, an NPK value could be 10-10-10. This means that the fertilizer contains 10% nitrogen, 10% phosphorus, and 10% potassium, with the rest of the fertilizer being made up of filler material.
Organic vs Synthetic Fertilizer
You have the choice of using either a synthetic or organic fertilizer.
Synthetic fertilizers are non-organic synthesized mixtures of the nutrients needed by plants to grow. They are manufactured to be fast-release, as they come in a format that is readily taken up by plants. They tend to be cheaper than organic fertilizers and work more quickly to deliver their nutrients. However, they provide less long-term fertilization and can have damaging effects on the nearby environment to wherever they’re applied.
Organic fertilizers are those made from organic materials, such as manure, compost, or grass clippings. They gradually enrich soil over time by releasing nutrients as they naturally decompose. While they work more slowly than synthetic fertilizers, they continue to fertilize the soil long after you apply them. Also, although store-bought organic fertilizers may run more expensive than synthetic fertilizers, you can easily make them yourself at home.
Granular vs Liquid Fertilizer
Fertilizers come in dry or liquid formats, being either granular or liquid fertilizers.
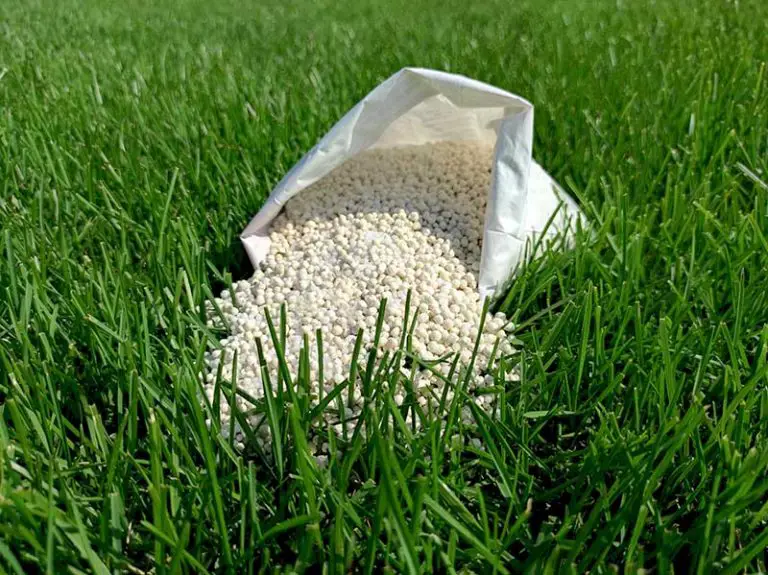
Granular fertilizers are made of dry organic or inorganic materials in pelleted or powdered form. They are a more slow-release type of fertilizer, breaking down gradually each time you water your lawn. This type of fertilizer gives you more control over your fertilization schedule.
Liquid fertilizers contain the same nutrients in a liquid format. This type of fertilizer will work faster to fertilize your grass plants but provides less long-term fertilization than granular fertilizers.
Fertilizers with Added Treatments
On top of the nutrients and micronutrients they contain, some fertilizers come with additional treatments to strengthen your lawn.
For example, if your lawn is suffering from a pest infestation, you should opt for a fertilizer with an added pesticide. Insect control fertilizers are formulated to tackle a number of pests such as ants, ticks, fleas, grubs, and chinch bugs.
If your lawn is susceptible to moss or fungus growth, you can purchase a fertilizer containing a fungicide. This will help to tackle common fungal infestations like brown patch disease or dollar spot fungus.
You also have the option of using a combined fertilizer and weed killer product known as weed and feed. These are fertilizers that contain a pre or post-emergent weed killer, in addition to their nutrients. If applied in the spring, pre-emergent weed killers can stop weeds seeds before they get a chance to germinate. Beyond spring, post-emergent weed killers are necessary to get rid of established weeds. Weed and feed products may target grassy weeds like crabgrass or nutsedge, or broadleaf weeds like clover.
Choosing the Right Spreader
There are two different types of fertilizer spreaders designed for the application of dry materials; rotary or broadcast spreaders, and drop spreaders. For liquid fertilizers, there are specially designed spray spreaders. The spreader that you choose will depend on the type of fertilizer you’re using, the size of your lawn, and the necessity for precision in the application process.
Broadcast Spreaders
Rotary or broadcast spreaders are suitable for most homeowners with small to medium-sized lawns. They are available in a range of sizes, so you’ll likely be able to find a spreader that suits the size of your lawn.
Broadcast spreaders work by using a rotating base that distributes granules that are fed in slowly through a hopper. The granules are spread several feet outwards to the front and sides of the spreader’s path. This mechanism allows you to cover an area three times the width of the spreader on every pass. Although they are less accurate than drop spreaders, broadcast spreaders are one of the fastest tools you can use to spread fertilizer.
Drop Spreaders
Drop spreaders are better suited for when you need a more precise application of the fertilizer. They allow more control over where the fertilizer lands, ensuring you don’t miss or double-cover certain areas. These spreaders are ideal if you want to avoid getting fertilizer on garden beds, sidewalks, and driveways nearby to your lawn.
Drop spreaders work by dropping the fertilizer through a wide, narrow opening that sits on the underside of the spreader. The product only drops between the spreader’s wheels, allowing you to easily and accurately control where you’re spreading the fertilizer. The biggest drawback is that it takes longer to cover the same amount of lawn as opposed to a broadcast spreader.
Spray Spreaders
Hose-end chemical sprayers or spreaders are the best choice when spreading liquid fertilizer or other liquid lawn treatments. You can also use this device to treat other household emergencies such as bug infestations.
Spray spreaders work by automatically mixing the treatment’s chemicals with a flowing jet of water. This mixture is propelled out of the spreader through a nozzle. Spray spreaders provide the least accurate method of fertilizer application but allow you to cover the lawn quickly.
How to Fertilize a Lawn
The best method to fertilize a lawn involves testing, amending, and preparing your soil, before using the appropriate tool to apply the ideal fertilizer for your soil’s needs. We have detailed this method in full in the steps below.
1. Test Soil
Before anything else, the first step towards fertilizing your lawn properly is to test the soil. By conducting a soil test, you can discover the soil’s current pH and the levels of each nutrient it contains. From this information, you can determine what type of fertilizer or pH amendments you’ll need to add to get your soil in optimal condition for growing.
You can either have the test performed by professionals at a testing lab or carry it out yourself at home.
How to Collect Samples for Testing
Professional testing involves collecting samples of your soil from across your lawn and sending them off to a professional laboratory. This is a service that your local extension office will provide, often at little or no cost. While it takes a little longer, this method of soil testing reveals the most accurate and detailed information about your soil.
If you choose to send your soil for professional testing, all you need to do at home is collect a sample of your soil. It’s best if this sample is made up of soil from all over the planting area to ensure you get the fairest test results.
Start by pulling 10 to 12 individual samples of soil from different parts of your lawn. Dig each sample from a depth of about 3 to 4 inches and ensure that they don’t contain any vegetation or excessive root masses. Mix your samples together, and place about one cup of this mix into a plastic bag. Label the bag with your name before sending it off for testing.
How to Test Soil pH Yourself
Alternatively, you can easily test your soil at home using a DIY testing kit. This method would help you to quickly determine basic information on the nutrient and pH levels of your soil.
There are several different methods available to you, ranging in accuracy, when it comes to testing your soil pH yourself. Your options include using soil pH test strips, a chemical soil pH test kit, a digital soil pH test meter, or a portable pH test meter. All options are readily available to purchase online or from your local garden center and are easy to carry out.
We have provided full guidance on how to use each of these tools in our step-by-step guide on how to test soil pH.
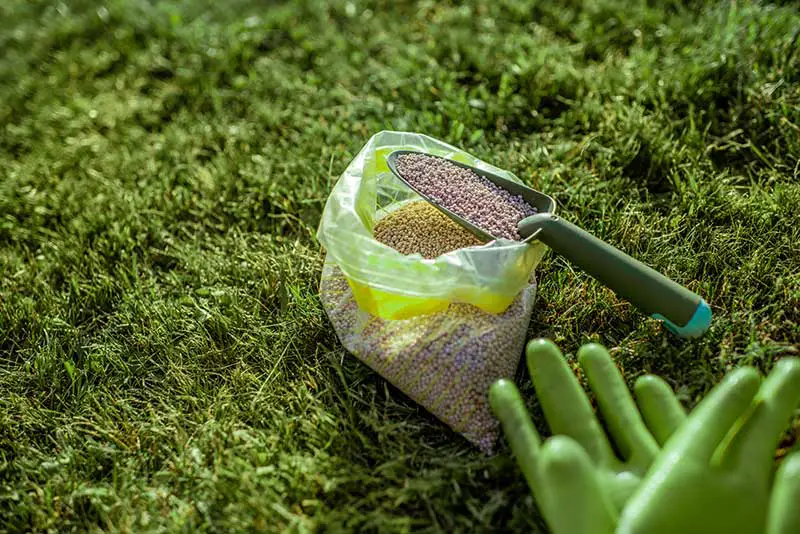
2. Purchase Appropriate Fertilizer
From the results of your soil test, you will now know what nutrients your soil is lacking. Use this information to select the ideal fertilizer that will enrich your soil with the nutrients it needs. Refer back to the guidance earlier in this article if you need help choosing the right fertilizer. At this stage, you should also apply any pH adjusting materials if your soil falls outside of the ideal pH range for your grass species.
The best type of fertilizer to use will also depend on the time of year you’re applying it to your lawn.
Early Spring Fertilization: Fertilizer with pre-emergent weed control
Late Spring Fertilization: Weed and feed fertilizer
Summer Fertilization: Fertilizer that promotes drought resistance
Late Summer to Fall Fertilization: Fertilizer with pre-emergent broadleaf weed control and winter prep
3. Wait for the Right Conditions
You should carry out your first fertilization during the spring, when soil temperatures reach 55ºF. You can use a soil thermometer to determine when the soil has reached this temperature.
The second fertilization you carry out will be in the late spring, between April and June.
You should fertilize for the third time during the summer, at some point between June and August. The last fertilization of the season should take place between August and November before the grass goes dormant for winter.
Before any application of fertilizer, you should always remember to check the weather forecast. Hold off from fertilizing if it’s forecast to rain; this will cause your fertilizer to be washed away, rendering the process pointless.
3. Prepare Lawn
One to two days before you plan on fertilizing, mow and rake the lawn. Assess the thatch layer and dethatch the lawn if necessary. Cutting the grass short and removing the excess organic matter will allow the fertilizer to permeate the turf more easily. Mowing straight before fertilizing also gives the grass the longest window of absorption and regrowth between cuts.
At this stage, we also highly recommend aerating your lawn. Lawn aeration helps to break up compacted dirt, leaving your lawn in better condition to absorb the nutrients from the fertilizer. Also, the holes left behind from the aeration process allow the fertilizer to reach deeper into the soil. This ensures that your fertilizer will be most effective at delivering nutrients straight to your grass’ roots. Fertilization is one of the many activities that you can do after aerating your lawn to get your grass in optimal growing conditon.
4. Water Lawn
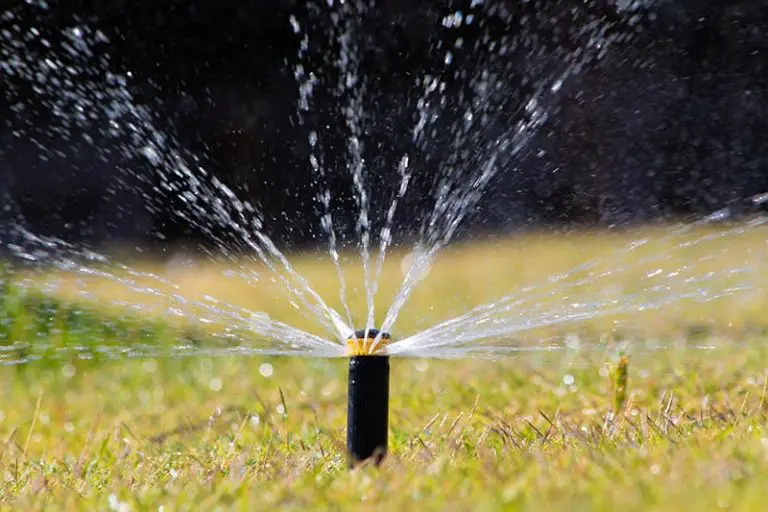
As part of your lawn preparation, you may also need to water it a few days before you plan on fertilizing. Watering the lawn before fertilizing doesn’t just prepare it to accept nutrients more easily; some products recommend against watering, while others require moisture to break down, such as granulated fertilizers. Double-check the label of your chosen fertilizer to make sure that watering the lawn before fertilizing is recommended.
5. Fill Spreader with Fertilizer
Once your lawn is fully prepped, you can start the actual fertilization process. Take your spreader of choice and place it on a driveway or patio. If you don’t have access to a space like this, place a tarp beneath your spreader; this will protect your grass from becoming burnt in one spot if you accidentally drop excess fertilizer when filling the tank.
Take your fertilizer of choice and place it into the tank of your spreader. Next, you need to make sure you have the right spreader settings to ensure the correct coverage of your fertilizer. Each product comes with its own recommended settings which you can find on the label of your chosen fertilizer. Set your spreader according to the guidance for your specific fertilizer.
As an extra note, it’s regarded as best practice to start off using slightly less to half of the manufacturer’s recommended application rate. This ensures that you don’t overapply the fertilizer, which not only saves you money, but also prevents you from burning and killing your grass.
6. Apply Fertilizer to Lawn
The method you use to apply your fertilizer depends on the type of spreader that you’re using.
How to Apply Fertilizer with a Broadcast Spreader
Begin applying the fertilizer by first walking your spreader around the perimeter of your lawn. This first pass means you can walk through the rest of your lawn without needing to worry about missing the edges.
Once you have covered the perimeter, fill in the rest of the lawn by walking the spreader in straight rows. Follow a similar pattern as you would when mowing the lawn, overlapping each row slightly as you go. Walk until you have covered the entire lawn.
How to Apply Fertilizer with a Drop Spreader
Begin applying the fertilizer by walking the spreader to cover two header strips at opposite ends of the lawn. These strips will function as a turning area.
Starting at one of your header strips, fill in the rest of the lawn by walking in straight lines perpendicular to the strips. Walk back and forth, overlapping each row by about half a foot as you go.
A general tip for the application process is to stay at least 6 to 8 feet away from water when applying the fertilizer if possible. This includes staying away from streams, rivers, ponds, lakes, and wetlands. The nutrients in the fertilizer can lead to excessive weed growth and algae blooms in bodies of water, and the chemicals can be harmful to aquatic wildlife.
7. Clean Up After Fertilizing
After you’ve finished fertilizing your lawn, you should clean up any fertilizer left behind from the process. Excess fertilizer that remains on driveways, sidewalks, or streets will eventually be washed away by rain before infiltrating nearby sewers and waterways.
If you have unused product leftover after the fertilization process, seal it back up and store it for later use. You should store your fertilizer in a cool, dry place that is inaccessible to pets and children. Fertilizers do go bad after some time, so check the packaging for a use-by date and take care when storing any leftover product.
8. Repeat Process As Necessary
Repeat these steps for each of your four fertilizer applications throughout the year.