How to Start a Lawn Mower
Whether it’s your first time mowing the lawn, or you’re using a type of lawn mower that you aren’t familiar with, getting the mower started can be an intimidating task. Even though there are some minor differences in mower operation model-to-model, the same technique can be used to get the majority of lawn mowers started successfully and ready to mow.
Read through this guide to learn how to start a lawn mower, or how to start a riding mower, depending on what type of device you’re using. We have also outlined a range of troubleshooting tips for both methods in the case that you follow the steps carefully but you’re still having trouble getting the mower to start.
Before you start your mower, make sure you’re mowing at the right time of day to avoid stressing or damaging your grass. See our article Best Time to Mow Your Lawn for the optimal times of day to mow.
How to Start a Lawn Mower
1. Clear Lawn Area
Before you get started, remove all objects from the lawn area to safeguard your lawn mower blades against damage. Pick up any pet or children’s toys and move lawn furniture out of the way. Also, make sure the area is cleared of any fallen tree branches or large rocks.
2. Check Mower Has Gas and Oil
Even though it may seem obvious, many gardeners forget to check that the mower has sufficient levels of both gas and oil before attempting to start it. If you’re using a new lawn mower for the first time, refer to the manufacturer’s manual to find out the exact fuel and oil recommendations for your specific model – we’ve provided some guidance on lawn mower oil in our article What Kind of Oil Does a Lawn Mower Take. Lawn mowers run at their best when they’re powered by clean, fresh unleaded gasoline. The gasoline you choose should be 87 octane at minimum, and shouldn’t contain more than 10% ethanol. This is because gas with high levels of ethanol can attract water, in addition to being corrosive and potentially damaging to the lawn mower’s tank.
3. Check Spark Plug is Connected
Look for the spark plug, which should be sticking out of the back or the side of the mower’s engine, connected to a lead similar to a thick wire that has a rubber cap attached to it. The spark plug is responsible for getting your engine running, so you must make sure that it’s securely attached to its cable. When attached properly, the spark plug and lead should look like a thick rubber tube fastened onto a metal protrusion. If it seems as though the spark plug isn’t attached as securely as it should be, refer to the user manual for your model as you may need to have it repaired by a mechanic. Regardless, you should have a mechanic change your spark plug once a year.
4. Check that Mower Blade is Sharp
Look at the mower blade and make sure that it is sufficiently sharp, that being about the sharpness of a butter knife. If the blades seem dull or have any visible nicks or dents in them, you will need to sharpen them before operating the mower. See our step-by-step guide on How to Sharpen Lawn Mower Blades if you’re unsure about the best way to go about this.
5. Prime Engine
NOTE: This step is typically only necessary if you’re using a new mower for the first time, or if your mower hasn’t been used for a prolonged period of time, e.g. over winter. You can also skip this step if your mower model doesn’t have a prime button. Not all models do, so you should double-check your user manual if you’re unsure whether yours does or not.
Find the prime button. This is usually a black or red button found somewhere on the body of the mower; refer to your mower’s user manual to find out the exact location of the prime button on your model. Push the button 3 to 4 times to pump gas into the lines – take care not to push too many times to avoid flooding the mower’s engine. If you do accidentally flood the engine, leave the mower for about 15 minutes to allow the gas to evaporate from the interior of the mechanism before attempting to start it again.
6. Open Throttle
Locate the throttle, which is usually a lever found either on the handle of the mower or on the body of the engine. Position the throttle level so that it’s on a mid to high setting. This ensures that your engine will keep running once it has been started.
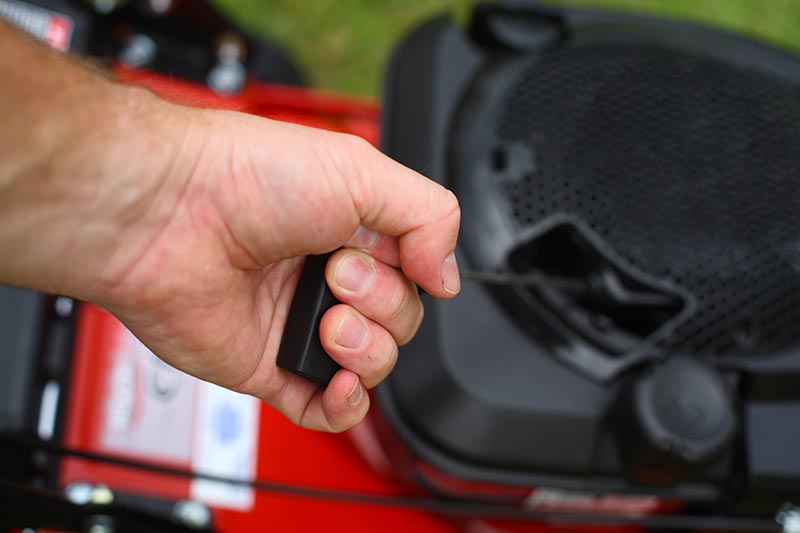
7. Pull Starter Cord
If your mower model has a horizontal lever running alongside its handle, press and hold it against the handlebar. Find the starter cord, which is a long rope or cord attached to the base of the mower that may have one or multiple handles. Grip the handle/s, and pull the cord using a single, long upwards motion until it has fully extended – pull with reasonable force, without jerking or yanking hard on it. It may take a few attempts before you successfully get the engine running. If you’re trying to start a cold mower, open the choke before pulling the cord to provide the engine with a richer fuel to air mixture. This helps the engine to stay running until it warms up. After a few minutes of letting the engine run, turn off the choke.
If your mower doesn’t start or make any noise at all, check that the spark plug is attached correctly and then try to start the engine again. If the engine still fails to start, or if the mower starts then stalls, there could be a number of potential causes – refer to our article Lawn Mower Starts Then Dies for a thorough list of potential causes and fixes for a failing lawn mower engine, or Lawn Mower Smoking if the mower is blowing white, blue, or black smoke.
Troubleshooting Tips When Lawn Mower Won’t Start
Check Gas
If your lawn mower hasn’t been used in a while, especially if it’s been sitting over winter, it’s extremely likely that any leftover gas in the tank will have gone bad. To check whether this is the case, smell the gas; if it has a strong, sour smell, this means that the gas has oxidized and therefore will need to be replaced. You can also drain a sample of gas from the tank and take a look at it; if it appears dark in color, this is also an indication that the gas has gone bad. Drain the bad gas from the tank and dispose of it appropriately, then refill the tank with fresh gas. Some mowers have a drain plug in their gas tank to enable easy drainage. If your mower lacks this part, you will need to use a length of hose to siphon the gas out of the tank.
Check Oil
You may need to change out your oil if your lawn mower fails to start or isn’t running smoothly. If you own a mower with a 4-stroke engine, you’ll be able to check the oil by opening up the oil fill cap or using the dipstick, and then fill it as necessary. If you own a mower with a 2-stroke engine, you’ll have to mix the oil into the gas – make sure to use the correct type of oil with the gas, mixing it in a proper ratio for your engine. Your mower needs fresh oil to ensure that the moving parts inside its engine are protected from heat, dirt and debris. It’s recommended that for brand new mowers, you should change the oil after the first five hours of use. For used mowers, you should change out the oil every spring/summer mowing season, or after every 50 hours of use, whichever comes first.
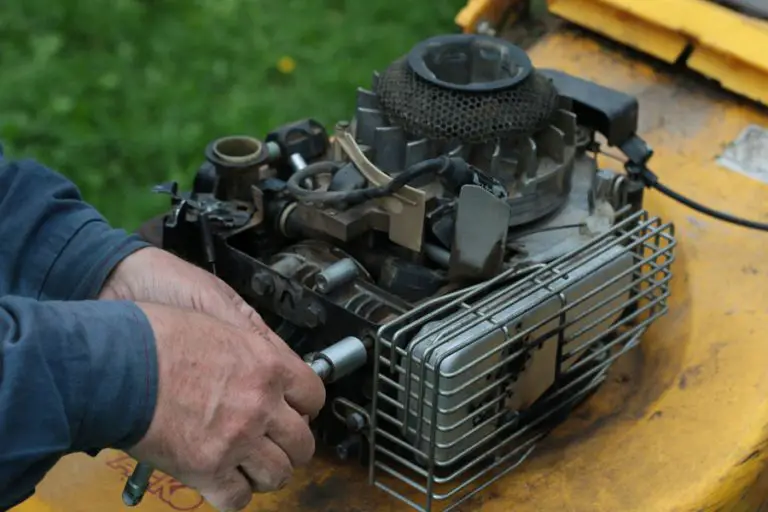
Check if Starter Cable is Stuck
If you find that your starter cable feels more difficult to pull than usual, the mower’s blades may have become stuck or clogged with grass. To check whether this is the case, first disconnect the spark plug – it’s essential that you make sure you have fully disconnected the spark plug before doing anything else, otherwise you run the risk of starting the lawn mower while your hands are still inside it. The spark plug can be disconnected by gently pulling the head of the rubber hose off from the metal attachment. Next, turn the mower on its side and then clear away any visible debris, taking care not to harm yourself on the mower’s sharp blades. If the starter still feels tough to pull after clearing the debris, you should take your mower to be seen by a mechanic.
Change Air Filter
A dirty or clogged air filter can make your mower run badly, or prevent it from starting at all. It’s inevitable that your mower’s air filter will become dirty and clogged over time, as it has the job of filtering out dirt and debris to protect the mower’s inner mechanisms. If the air filter becomes severely dirty or has been flooded with gas, it restricts the flow of oxygen to the combustion chamber, which will in turn prevent the engine from starting properly. You will need to remove the air filter to examine it and change it out if necessary. Locate the air filter, which will either be made from paper and encased in a small cylinder, or made of a foam material and encased in a metal rectangle. If you’re unsure where the air filter is on your mower, check the manual for your model. Examine the filter, and change it out if it appears to be clogged with dirt or saturated with gas. You can easily purchase a new filter from your local hardware store.
Check Spark Plug
The spark plug will fail to start the mower’s engine if it is dirty, wet with liquid or gasoline, or if it isn’t connected to the mower properly. Locate the spark plug jutting out from either the side or the back of the mower engine, and make sure it’s securely attached to its cable. Remove the spark plug from the mower, and use a carburetor cleaner and a damp rag to clean it up. The carburetor cleaner contains a solvent that will remove any leftover oil residue coated on the spark plug. Wait until the spark plug has completely dried out before reinstalling it on the mower engine.
Tighten Brake Cable
A loose brake cable may prevent your mower from starting. In order to check the brake tension, pull the brake handle then pull on the brake cable. This probably isn’t the source of the problem if the cable feels taught, but it could be if you feel any give in the cable. To confirm that the brake cable is loose, try to start the mower while holding the brake cable taught. If this starts the mower, it’s indicative that the brake cable needs to be tightened. You can quickly and easily DIY this job using a wrench and a set of vice grips.
Clean Carburetor
Dirty or clogged carburetors are a common cause of a lawn mower failing to run properly. The carburetor is responsible for mixing oxygen and gas in the correct proportion to create combustion, which regulates the flow of fuel to the crankshaft that powers the mower’s engine. If the carburetor bowl becomes blocked with fragments of dirt, it will cause the mower to start then stall. Locate the carburetor, which should be on the side of the mower in the area above the base. The carburetor sits behind the air filter’s encasement, which can be removed to enable easy access. Examine the carburetor, and if it appears dirty or clogged it will need to be cleaned or possibly even replaced. You can clean the carb by removing it and soaking it in carb cleaner or vinegar. If this doesn’t remove the blockage, you may need to replace the part.
Check for Broken Flywheel Key
If you accidentally hit a hard object while mowing, this can break the flywheel key which in turn prevents the mower from starting. The flywheel is the large horizontal wheel inside your mower that starts spinning when you pull the mower’s starter cord, and serves several purposes including helping to cool down the engine, maintaining engine speed, and playing a necessary role in the engine’s ignition process. The flywheel also helps to absorb shock when the mower hits a hard object like a curb or rock, protecting the rest of the mower from damage. With that said, the flywheel can only withstand a certain amount of shock and can become damaged if it collides with something too hard. If you have accidentally run the mower into a root, rock, or large tree, it could have broken the flywheel key which will prevent the engine from starting. You can check whether the flywheel key is broken by removing the flywheel from your mower, however, this is a tedious process; the nut that keeps the flywheel in place is fastened quite tightly, and the flywheel has to be kept stationary in order to loosen the nut.
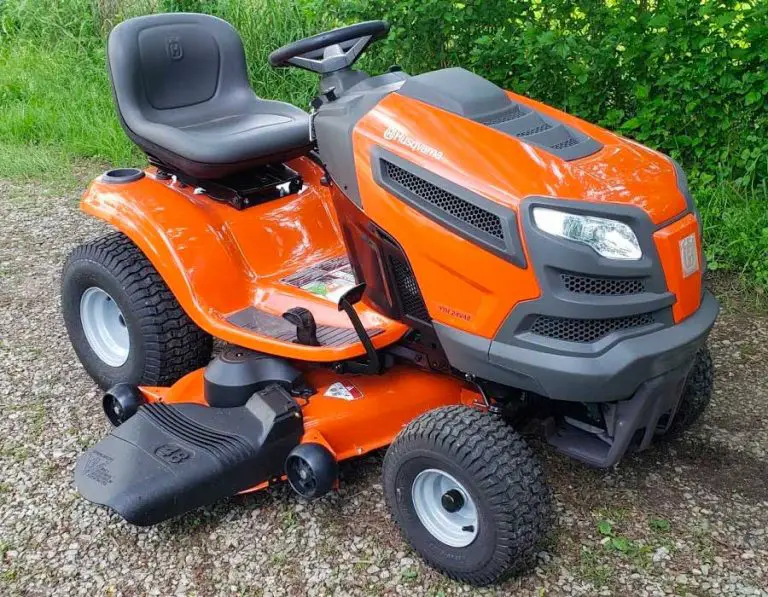
How to Start a Riding Mower
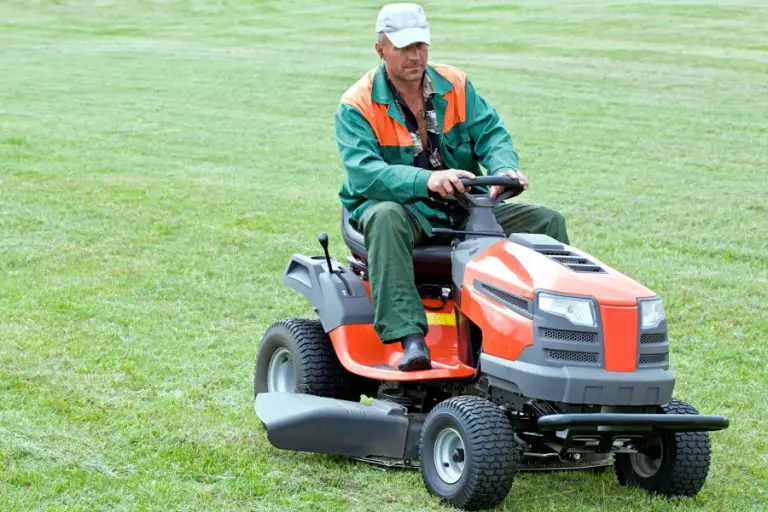
1. Sit Firmly on Mower Seat
Sit firmly on the seat of the mower. Situate yourself so that all levers and pedals are within your comfortable reach. Some models of riding mower have a safety feature that causes the engine to shut off unless the user is sitting on the seat or the parking brake has been engaged.
2. Engage Brake
Engage the mower’s brake. This will be found on the left side of your mower, either as a pedal near your left foot, or a lever that you can reach with your left hand. Depending on the type of brake your model has, push the pedal or lower the lever to engage it, and hold it in this position.
3. Engage Parking Brake
Next, engage the mower’s parking brake. Look around yourself and to the left and the right of the seat, and it should appear as a knob or a lever near you. Pull up the knob or lever of the parking brake while also slowly releasing the brake pedal.
The exact location of the parking brake varies from model to model, so check the manufacturer’s manual for your mower if you’re unsure where this is located on your specific model. If your mower doesn’t appear to have a brake knob, you may need to engage the parking brake by pushing down on the brake pedal.
4. Shift Gear Into Neutral
Find the gear shift lever. This is usually located close to the steering wheel, but can also be found below the seat. Once you locate the lever, shift it so that it’s next to the ‘N’, putting the mower into neutral position. Take note that some models of mowers, particularly those that don’t have a parking brake knob, may require you to hold the brake down as you’re shifting gears.
5. Pull Throttle Into Choke Position
Find the throttle lever. This will likely be located next to the seat on the left-hand side; many throttles are easy to identify as they use depictions of a rabbit and a turtle to indicate the speed setting. Move the throttle lever into the correct position to engage the choke. Depending on the model of mower that you own, you can engage the choke by either positioning the lever so that it sits between the fast and slow setting, or by pulling it beyond the fastest setting to its highest point which may be marked by a circle with a diagonal line running through it.
6. Insert Ignition Key and Turn to Right
Take the ignition key for your mower and insert it into the ignition switch. The switch may be located either on the dashboard in front of you, or it could be next to the seat. Turn the key all the way to the right, and you should hear the mower’s engine beginning to start up. The key may need to be held in this position for about 15 seconds or longer before the engine gets running.
7. Move Throttle to Fast Position
Once the engine has started, go back to the throttle lever and release the choke by moving the lever into a faster setting – this is the setting often marked with a picture of a rabbit. It may be necessary that you wait until the engine has warmed up before you can get going if you have an older mower, but aside from that, your lawn mower should be ready to use.
Troubleshooting Tips When Riding Mower Won’t Start
Check Gas
Make sure that your mower has a sufficient amount of fresh gas before attempting to start it up. Most mowers have a fuel gauge to let you know how much gas is in the tank. If yours doesn’t have a gauge, check yourself to ensure the tank is at least ¾ full of gas and isn’t leaking. If the gas smells sour or appears to be dark in colour, it will need to be replaced, as these are telltale signs of oxidation. Without a stabilizer, gas will usually go bad within about 30 days of it sitting in the gas tank and will clog the inner mechanisms of the mower.
Check Oil
If there isn’t enough oil in your riding lawn mower, or the oil that is in it has gone bad, this will prevent the engine from running correctly. Find the oil valve, which is usually located near the engine. Use the dipstick attached to the cap of the oil tank to dip into the tank and examine the oil. If it’s black or looks like it has deteriorated in any way, you will need to change out the oil. As a note, it’s recommended that you change your riding mower oil after every 100 hours of usage and/or annually, doing so more frequently than this if you use the mower in dusty conditions. Fresh oil is essential to protect the inner workings of your mower from becoming damaged by heat, dirt, and debris.
Clean Carburetor
Over time, the carburetor in your riding mower’s engine can become dirty and clogged with grass, twigs, and other debris, which will cause the mower to start then stall. Locate the carburetor on the side of the mower’s engine, either below or behind the air filter. Remove the air filter housing and air filter, and follow the fuel line from the gas tank, at the end of which you’ll find the carburetor. Examine whether it is dirty or clogged, and clean the carburetor if necessary. Carburetor replacements are more complicated on riding mowers than those on walk-behind mowers, so consult the manual for your machine carefully before attempting to carry out any repairs or replacements yourself.
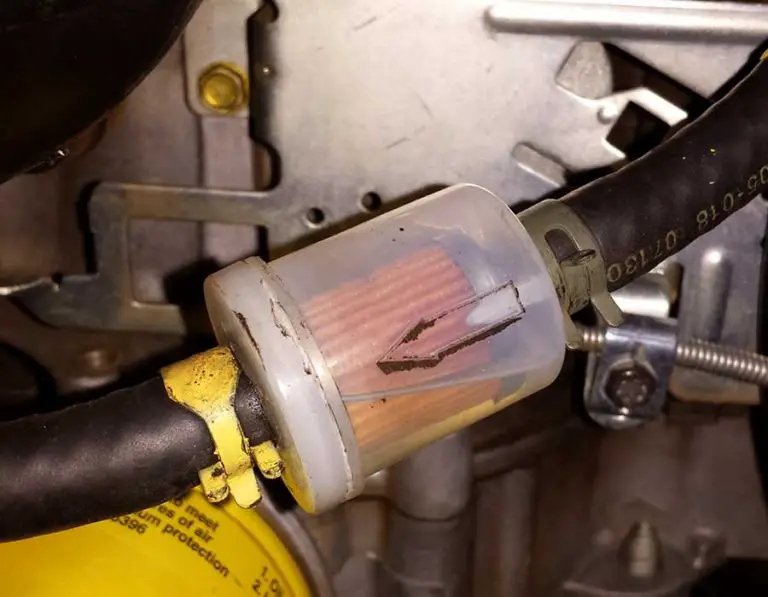
Replace Fuel Filter
Check the fuel filter, found either on the right or left side of the engine within the engine compartment. These filters can become clogged, usually as a result of debris gathering during mowing, or after the mower has been running on stale gas. If your fuel filters are clogged, it prevents the flow of fuel to the carburetor and therefore will prevent you from starting the engine. Replace the filters if they appear to be dirty or clogged.
Replace Battery
All batteries have a finite lifespan, and will gradually wear out with use. Use a voltmeter to check the battery’s voltage and to make sure that it has enough battery acid. To use a common battery voltage as an example, a voltmeter should show roughly 12 V when used on a 12 V battery. Anything lower than this indicates that the battery has deteriorated and needs to be charged or replaced.
Replace Starter Solenoid
The starter solenoid is found inside the mower’s starter motor. It’s a small magnetic device that receives an electric charge from the battery when the ignition key is turned onto the ‘start’ position. This charge causes the solenoid to close a switch, which in turn sends a larger amount of electrical current to the starter motor. The final result is that the starter motor shaft starts to rotate and engage the teeth of the mower’s flywheel. If the starter solenoid is damaged or worn out, it will prevent the engine from starting. You can check whether this is the case by turning the mower’s ignition key; if the mower fails to start but you can hear clicking, this is a sign that the starter solenoid has gone bad and will need to be replaced.
Clean or Replace Air Filter
Using a riding mower with an air filter that’s dirty, clogged, or worn-out will gradually cause damage to the mower’s engine, as it prevents the engine from drawing in enough air to run properly. This eventually does so much damage to the engine that it will fail to start at all. Find the air filter on your riding mower, which is located on the side of the engine, typically behind a cover made from plastic or metal. Depending on the model of mower, you will need to use either a wrench to loosen the bolts or a screwdriver to loosen the screws which hold the air filter housing in place. Pull out the filter, and check if there are any cracks in the frame, or if there are tears or holes in the filter’s pleats. If you notice either of these defects, you will need to replace the part entirely. If the filter appears dirty, you will need to clean it before replacing it back into the mower.
For advice on how to turn your grass into a manicured, aesthetically pleasing lawn, see our article How to Stripe a Lawn.