Tilling Soil: What is Tilling and How to Till Soil Step-by-Step
Tilling is the process of turning over soil in order to break it down and loosen it up, carried out either by hand or by using powered tilling equipment. It significantly improves the condition of a planting area by working to aerate the soil, destroying weeds, and helping with pest control, which creates the ideal environment for newly planted seeds or seedlings. Tilling is also often carried out as a means of working organic amendments into a planting area, as it helps to incorporate the organic matter inches deep into the soil surface where the amendment can do its best work to enrich and improve the soil.
Read through this guide to find out more about the benefits and drawbacks of tilling soil, when the best time is to till soil, and some information about the various available tools that can be used to till soil. We have also included some general step-by-step guidance on how to till soil for best results in your lawn.
What is Tilling?
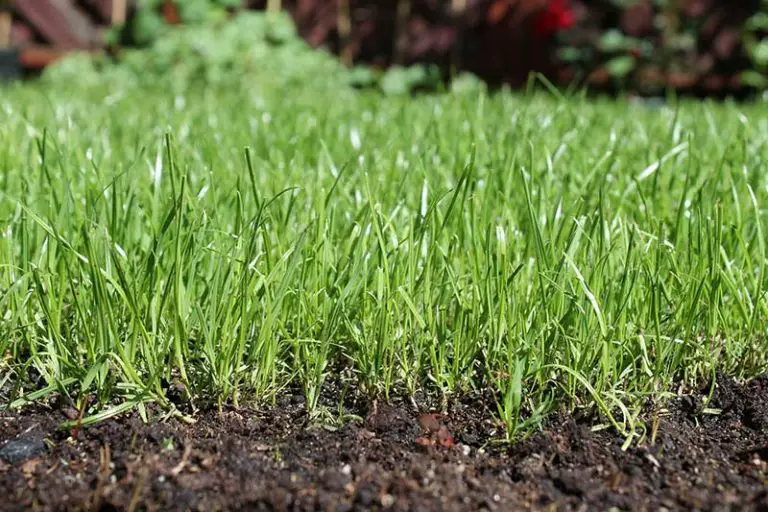
A common gardening practice, tilling is simply the process of turning over soil to break down the large clumps of dirt into smaller particles, which leaves the resulting soil with a finer consistency. It is often carried out to break up a top layer of hard or compacted soil, to prepare a bed or small area for planting, or as preparation before adding soil amendments or fertilizers. There are a number of different tools that can be used to either till soil by hand, or by using powered equipment such as a rototiller. We have gone into more detail about each of the various tilling tools you could use to till your soil further down in this article.
What Does Tilling Do?
The process of tilling provides a number of benefits for your lawn or garden (and the grass or plants growing in it), including the aeration of the soil, working amendments into the soil, destroying weeds in the planting area, and helping with pest control throughout your yard.
Tilling Aerates Soil
Soil aeration is one of the main benefits of tilling soil. Over time, factors like rainfall and foot traffic will cause soil to become increasingly more hard and compacted, meaning that the soil lacks the space and empty pockets necessary for air, water, and organic matter to penetrate deep enough below the soil surface. Without these small spaces in the soil, seedlings and plants are unable to access the substances they need such as these and will struggle to grow properly. Additionally, the spaces are essential for friendly microorganisms in the soil to create nutrients for the plants and carry out their many other beneficial functions. In addition to promoting soil aeration, tilling also helps to loosen the ground in the planting area so that plant roots and root vegetables are able to easily spread throughout the soil.
Tilling Aides Fertilizer Application
It’s common practice to add compost or other organic fertilizers to the soil as part of the tilling process. Tilling helps to work the matter inches deep into the planting area where it will gradually break down and enrich the soil, providing the soil and plants with the most long-term benefits. It also creates the spaces necessary for the nutrients to work their way through the soil and reach every sown seedling or growing plant.
Tilling Destroys Weeds
Tilling your soil twice a year can be an effective method of reducing weed growth season-to-season. As the tilling equipment breaks up the soil, the manual action also destroys the weeds and their roots. Tilling soil in the spring enables you to chop up young weeds before they have had a chance to become a bigger problem; tilling soil in the fall can reduce the growth of perennial weeds by preventing them from retaining energy during their period of winter dormancy.
Tilling Helps With Pest Control
Turning over the soil can help to control the presence of undesirable insects and pests in your yard. By tilling the soil in the fall, you disrupt the homes of soil-borne larvae and insects that would otherwise lay in wait during winter before hatching in the spring. The action of tilling kills these insects and prevents them from wreaking havoc in your yard before they get the chance at the beginning of the next growing season.
What Are the Drawbacks of Tilling?
Despite the many benefits of tilling, there are also some drawbacks to be considered before you set out to till your soil. Tilling may unearth dormant weed seeds in the soil, burn the soil’s humus, kill off helpful earthworms in the soil, reduce the soil’s overall level of nitrogen, and cause areas of soil erosion throughout your yard.
Tilling Unearths Dormant Weed Seeds
Despite the fact that tilling can be carried out in an effort to control and prevent weed growth, the process can actually cause weed growth by unearthing dormant weed seeds within the soil. When the seeds are stirred up by the tilling, they can germinate and produce new weeds, even after the old weeds on the surface have been destroyed.
Tilling Burns Humus
By tilling, you may end up burning the humus in the planting area – this is the part of the soil made up of organic matter such as decayed leaves and plant material. Although aeration is one of the goals of tilling soil, introducing too much air can burn up the soil’s humus. This in turn prevents growing plants from being able to benefit from the nutrients in the humus.
Tilling Kills Earthworms
The chopping action of tilling soil often causes the death of earthworms living in the planting area. Earthworms are an extremely beneficial organism for your garden or lawn; they behave as natural aerators and fertilizers as they move through the soil by digging, digesting soil, and expelling nutrients through castings.
Tilling Causes Erosion
Over time, regular tilling wears away at the soil in your garden and the landscape of your yard. Erosion is promoted by tilling as you’re reducing the particle size of your soil each time you till, creating soil that’s more easily washed away by rain or blown away by the wind. Soil erosion causes a lot more problems for your soil, including increasing the need for you to rely on fertilizer to keep it in good condition. It can also cause damage to nearby waterways from water runoff.
Tilling Reduces Nitrogen in Soil
The action of tilling may cause the levels of nitrogen in your soil to drop. Under the top layer of soil in your garden or yard, there are lots of microorganisms working to produce nitrogen, which is one of the primary nutrients needed by plants to grow strong and healthy foliage. When you till, you expose these helpful organisms to the sun which causes them to die, thus halting their contribution to the overall nitrogen levels in your soil. This may cause your soil to start turning yellow or dying off, which would necessitate the application of a high-nitrogen fertilizer along with an overseeding job.
When to Till Soil
In terms of the time of year, the best time to till soil is once at the start of spring, and once again in the fall. Even though tilling the soil once during the spring is sufficient for most lawns and gardens, it is recommended to till soil at these two times per year to see the best results.
At the start of spring, the ground-hardening winter frost has passed, and the growing season for many plants and grasses is beginning. Depending on the climate of the area that you live in, the exact best time to start tilling in your own backyard will fall somewhere between March and May. You can start as soon as your soil has thawed out after the winter freeze, or any time onwards from this point throughout the growing season.
During the fall, it’s recommended to till the soil for a second time before winter sets in. Doing so provides the soil with organic matter that will slowly decompose over the winter season, creating the ideal soil conditions for new or existing plants in the next growing season. With that said, it’s usually only recommended to till in the fall if you’re planning to add substantial amounts of organic amendments to the soil.
As a general rule, you should always try to avoid tilling soil when it’s wet. Doing so can lead to areas of compacted soil, which makes it even harder for grass and plant roots to grow down into the ground after it has dried out. Make sure that the soil is completely dry before you start by taking a small clump and working it between your fingers; if it crumbles easily, you can start to till, but if the clump sticks together at all, you should hold off from tilling for a little while longer.
Tools for Tilling Soil
There is a range of different tools that can be used to till soil. These include manual tilling tools that can be used to till soil by hand, or powered tools which take a huge amount of the work out of the tilling due to their motorized mechanisms.
Hand Tilling Tools
Hoe
You could use a regular garden hoe to till soil in preparation for planting, but this is probably the most rudimentary and labor-intensive method of tilling. We advise that you save the hoe for smaller jobs, such as weed removal before tilling with a rotary tiller, or to work soil that’s in a tight space without causing any damage to the roots of the surrounding established plants.
Cultivator Rake
If the soil or planting area only has light compaction and doesn’t require heavy-duty tilling, then you can till the soil by hand using a cultivator rake. This tool appears similar to a miniature rake, having a handle and 3 to 5 metal prongs that can be used to drag into the surface of the soil to break it up. Cultivator rakes are ideal for tilling to level out a planting bed, planting seeds, or spreading mulch; they aren’t suitable for spreading compost, however, as this requires a tool with a deeper reach to work the compost deeper into the soil.
Hand Tillers and Twist Tillers
Other tools that enable you to till soil by hand are hand tillers and hand twist tillers, available as either short handheld devices or upright devices with a long handle. These tools are only suitable for smaller-scale jobs as they require a substantial amount of labor to operate. They are most effective when used to till small patches of soil or in tight areas where the soil needs to be worked without the risk of damaging the nearby plant life.
Broadfork
Also known as U-bars, broadforks are multi-purpose tools that can be used to till soil by hand effectively without damaging the structure of the soil or causing the soil layers to mix. Having a pitchfork-like base and long tines, broadforks are designed for easy operation; you use your body weight to drive the tool deep into the soil, then pull up on the handles to break it up. Due to this design, they require relatively little effort when used to till soil in larger areas.
Power Tilling Tools
Auger
Augers are powered tools that take a significant amount of work out of tilling soil on larger spaces. They use a motorized drill attachment to dig precise holes into the ground, which in turn loosens the soil while mixing in any additional compost or soil amendments. Augers are a great option when tilling soil in large planting areas or new gardens.
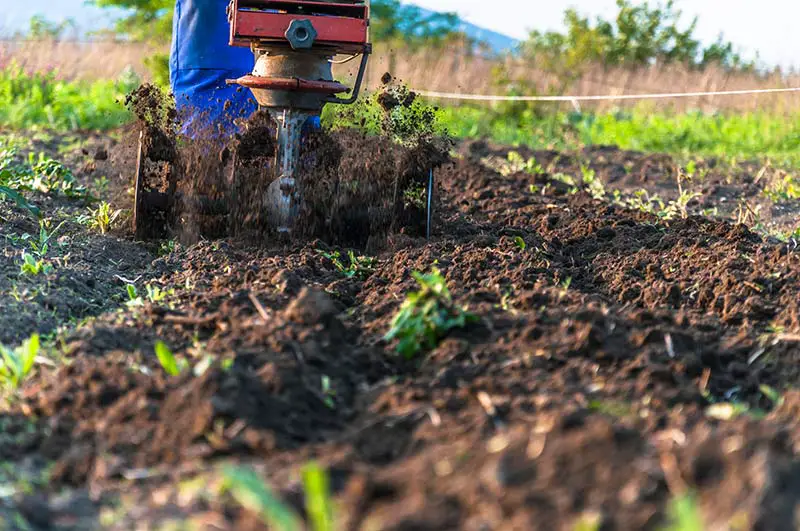
Rototiller
The most effective tool to break up areas of soil that are large or severely compacted is by using a motorized rotary tiller or ‘rototiller’. The tool’s strong motorized tines are powerful enough to break through large clumps of hard dirt, mix compost deep into the ground, and cover up old dead plants with soil. Rototillers come in a variety of different styles depending on the size of the area they’ve been designed to be used on. For homeowners who are tilling soil in a garden or lawn, self-contained rototillers are available in either electric or gas-powered models that can be pushed through the soil to break it up. For plots of land that are on a larger scale, there are rototiller attachments that can be mounted onto a tractor to till soil on very large areas.
How Deep to Till Soil
When tilling in order to mix soil amendments into the planting area, you only need to till the soil to a depth of 4 to 8 inches. When tilling a planting area in preparation to plant new seeds or plants, you should till the soil to a depth of at least 8 to 10 inches, and maybe even deeper than this if the soil is severely compacted or in poor condition.
How to Till Soil
No matter what tool you’re using to till, follow these steps for some general guidance on how to till soil before planting new plants or grass.
1. Prepare Area to Be Tilled
Walk through the area you plan to till and remove visible debris. This includes any stones, weeds, roots from trees or shrubs, and any other waste that may interfere with the tilling process. You can use a garden hoe to loosen weeds, and dislodge stubborn rocks or roots using a pickaxe. Skipping this step means that you risk damaging your chosen tilling tool.
2. Demarcate Area to Be Tilled
Mark the rows and boundaries of the area you plan to till. You can do this by tracing out clear lines on the surface of the soil, or by placing lengths of string or spare lumber along the boundaries of the area.
3. Spread Compost in Area
If you plan on adding compost to the tilled soil, spread it throughout the planting area making sure that it is 4 to 5 inches deep. This ensures that the organic matter is distributed evenly throughout the soil during the tilling process. We highly recommend that you add compost to the soil at this stage if you haven’t already planned to do so, as it provides a number of benefits to improve the condition of your soil before sowing new seeds.
4. Start Tilling Soil Slowly
Using your chosen tilling tool, start walking along the first row of the planting area and tilling the soil as you go. It’s important to maintain a slow and steady pace while you do this, particularly if you’re using a powered tilling tool. Work slowly and allow the tool to till the soil thoroughly in each section of the row.
5. Till Soil Row By Row
Continue to till the soil in the planting area row by row, in the same way that you would mow the lawn. This prevents already-processed patches of soil from becoming overtilled; overtilling causes soil to become compacted, which is the opposite of the aerating effect that you’re trying to achieve by tilling.