DIY Compost Bin: 4 Easy Methods
When composting, the goal is to create a fertile, nutrient-rich matter that you can add to your lawn or garden to enhance the health of your plants. All you need to achieve this from your composting activities is to have a well-built, well-maintained compost bin. And, regardless of your available outdoor space and budget, it’s easy to make your own compost bin from materials you may already have laying around your home.
There are several ways to make a compost bin using different materials, including a plastic tote, trash can, wooden pallets, or wire fencing. The type you choose depends on the space you’re working with and the materials you have at hand.
We have explained 4 different methods to make a compost bin, ranging in size to suit those working with both small and large spaces. We have also provided information on the type of materials you should and shouldn’t add to your compost pile.
What is Compost?
Compost is the end product of the process of composting. It is a nutrient-rich substance used in horticulture, agriculture, and gardening to promote the healthy growth of grasses, plants, trees, shrubs, and crops. High-quality compost contains a healthy balance of green and brown organic materials – we discuss these materials in more detail later in this article.
The composting process involves the natural process of decomposition that happens to all organic matter over time. Anaerobic organisms such as bacteria, fungi, and larger organisms like nematodes and worms are responsible for this decomposition; they break the organic matter, and the resulting substance is usable fertile compost.
Decomposition of organic matter by these organisms takes time to occur naturally. But, by composting using a compost bin or pile, you can speed up the process to create fertile compost for your lawn or garden for free. You do this by providing the organic matter and microorganisms with the ideal conditions to encourage the decomposition process; a well-built compost bin retains enough heat within the organic matter for the microbes to be most active. At the same time, the bin must be well-aerated to allow the flow of air around the organic matter.
In composting, the organic materials that you can use in a compost bin fall into one of two categories; all biodegradable materials are either green or brown matter, depending on their composition. Brown materials are those rich in carbon, while green provide the compost with nitrogen.
What Materials Can You Use in a Compost Bin?
It’s important to have the right balance of green and brown materials to encourage the speedy decomposition of your compost. While some opt for a half-and-half mixture, an alternative is to use ⅓ green materials to ⅔ brown.
Brown Materials
Brown materials are carbon-rich, providing the microorganisms with an energy source while giving the compost its light, fluffy texture. Materials that fall under this category are typically fibrous or wood-based.
- Cardboard
- Coffee grounds or filters
- Corn cobs and stalks
- Dryer lint from natural fibres
- Dry leaves
- Newspaper
- Pine needles
- Sawdust pellets
- Shredded paper
- Shrub prunings
- Straw or hay
- Wood ash
- Wood chips
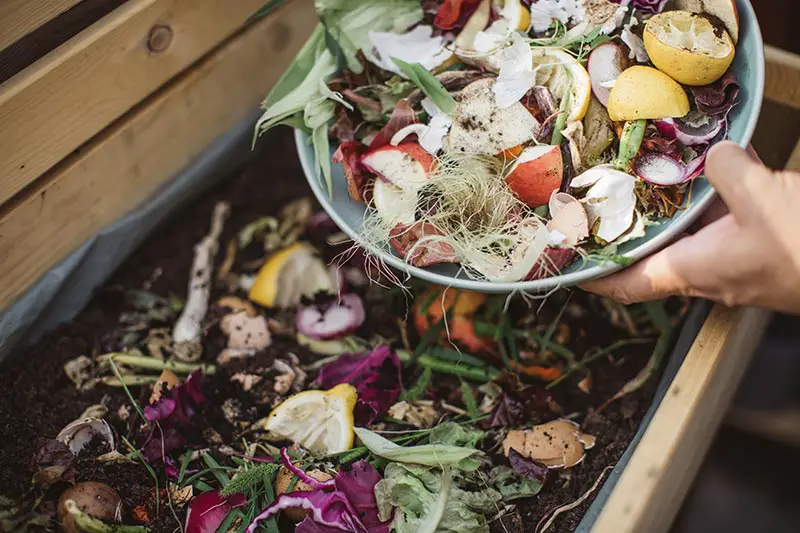
Green Materials
Green materials provide the compost pile with nitrogen, giving the microorganisms amino acids and proteins necessary for the decomposition process. These materials are typically from plant and animal matter.
- Animal manure
- Flowers and plant cuttings
- Fruit and vegetable scraps
- Grass clippings
- Green comfrey leaves
- Leftover food scraps
- Seaweed and kelp
- Tea leaves
- Weeds from lawn and garden (that haven’t gone to seed)
What Materials Can’t You Use in a Compost Bin?
While there is a huge range of materials you can place in your compost bin, some types of organic matter are not suitable for composting. This includes dairy and animal products such as eggs, meat, or bones; this type of waste will attract unwanted pests due to the odor they give off during decomposition. The same applies to any oils, fats, or pet waste. Also, plant matter infected with disease or pests could contaminate your compost, rendering it unusable.
We have listed the materials you shouldn’t use in a compost bin below.
Food Waste
- Animal meat and bones
- Egg whites and yolks
- Dairy products
Yard Waste
- Plant waste infected by disease or pests
- Sawdust or woodchips made from treated wood
- Weeds that have gone to seed
Other Waste to Avoid
- Chemicals
- Coal or coal ash
- Grease
- Human waste
- Pet waste like dog or cat poop
- Plastic material
When to Start Making a Compost Bin
The best time to start building your compost bin is during the early spring. At this time of year, temperatures are ideal to promote the decomposition of the organic matter involved in the composting process. The warmer months are when organisms like bacteria and fungi come to life and start to decompose the organic waste; this is when the waste starts to transform into usable, nutrient-rich compost.
Once you start adding materials to your bin in spring, tending to your compost bin will become a year-round activity. In spring, you can add dead plant material left over from the previous growing season. Throughout summer and fall, continue to build the bin by adding your other types of organic material like food scraps. Although the decomposition process will pause over winter when temperatures drop, you can still keep adding material to the bin; when the temperatures warm up the following season, the process will start all over again.
How to Make a Compost Bin
As we’ve discussed, the key function of a compost bin is to provide an ideal environment for the decomposition process. All you need is a contained environment that helps the pile to retain heat, while also allowing the circulation of air around the matter.
You can create this environment from a number of different materials, many of which you may already have laying around your home. If you don’t already own them, all of the materials involved in these DIY compost bins can be obtained for free or at a very low cost.
Below, we have listed methods on how to make a compost bin using a plastic tote, trash can, wooden pallets, or wire fencing.
How to Make a Compost Bin Using a Plastic Tote
This method utilizes an item you may have already lying around your home, a regular plastic storage tote. If you don’t already have a tote to spare, they are available for purchase at a very low cost. All you need to do is drill holes into the tote to create pathways for air to flow around the decomposing matter. This method should produce usable compost in about 3 months.
What You Need:
- Large Plastic Tote: A tote with a capacity of around 18 gallons should suffice – this is the type of plastic container you would typically use for home storage.
- Drill: You’ll need a hand drill to drill holes in the tote.
- Drill Bit: Use either a 5/16 inch or 3/8 inch drill bit.
- Composting Materials: Gather dirt, organic matter, and shredded cardboard to start off your compost bin.
Steps:
- Make sure the lid is securely placed on the tote before turning it over to face bottom-side-up.
- Load a 5/16 inch or 3/8 inch drill bit into your drill.
- Drill holes on the bottom and sides of the tote, spacing them roughly 2 inches apart.
- Turn the tote back over to face the lid-side up.
- Drill holes on the lid of the tote, this time spacing them further apart at about 3 to 4 inches.
- Take the lid off and cover the bottom of the tote with shredded cardboard as the base layer of your compost.
- As the second layer, add a few inches of dirt from your yard.
- Then, add in your organic matter such as food scraps or dead plant waste.
- Finally, spray some warm water over the contents of the bin. Put the lid back on and give the whole tote a firm shake.
- Every few days, continue to add organic matter and mix the contents of your new bin.
How to Make a Compost Bin Using a Trash Can
You can use a trash can to create a larger volume DIY compost bin. Again, this method requires you to drill holes around the trash can to create pathways for aeration. You’ll also have to cover the holes with metal screening to prevent the compost from falling out of the can. Under ideal conditions, this method can produce usable compost in as little as three weeks. With that said, the process typically takes around 2 months to complete for most.
What You Need:
- Trash Can: You can use either a metal or plastic trash can with a capacity of 32 gallons or more and a fitted lid. Metal trash cans are recommended if you have issues with rodents or pests in your area.
- Drill: You’ll need a drill to create holes in the trash can necessary to aerate the compost.
- Hole Saw Drill Bit: Fit your drill with a 2 or 3 inch hole saw drill bit.
- Aluminium Screening: You need to cover the bin’s holes with metal screening.
- Adhesive: You will also need epoxy adhesive or silicone caulk to fasten the screening in place.
- Composting Materials: Use a mix of green and brown organic matter to start off your compost.
- Bricks: While it isn’t necessary, it’s recommended to prop the bin up using bricks to allow aeration on all sides of the pile.
Steps:
- Purchase a metal or plastic trash can with a minimum capacity of 32 gallons.
- Fit your 2 to 3 inch hole saw drill bit into your drill.
- Drill holes around the entirety of the trash can, including on its top, bottom, and sides, spacing the holes about 6 to 12 inches apart.
- Cut pieces of your metal screening in pieces that would be large enough to cover the newly drilled holes.
- Secure the screening over each hole on the inside of the bin using your adhesive.
- Place the trash can somewhere convenient. Optionally, place it on top of a couple of bricks to elevate the bottom of the can from the ground.
- Start adding your green and brown compostable organic matter to the bin.
- Over the following weeks, keep monitoring the pile. It should feel a similar dampness to a wrung-out sponge; if it’s any wetter or drier than this, the pile will struggle to decompose properly.
- Over these weeks you will also need to keep the pile well-aerated. Do so by setting the trash can on its side and rolling it over a few times. Repeat this process 1 to 2 times per week until your compost is fully decomposed.
- Your compost will be ready to use when it cools off and resembles a uniform, dark brown substance similar to soil.
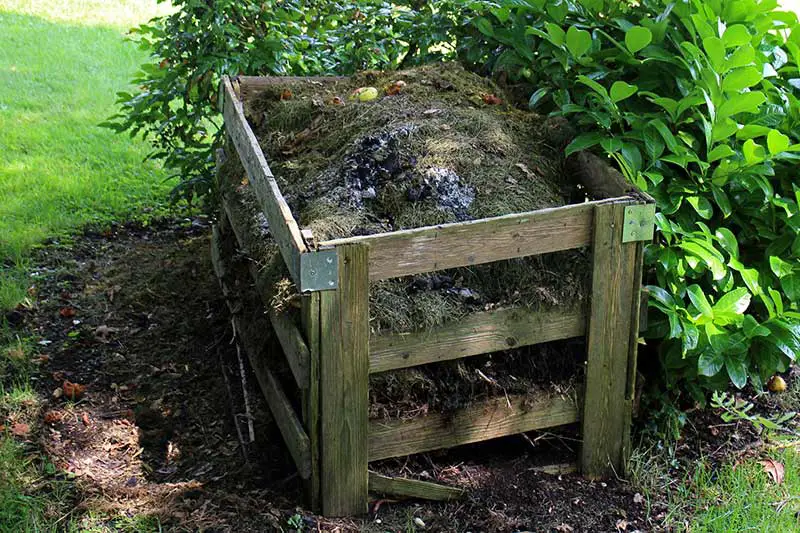
How to Make a Compost Bin Using Pallets
Another way to build a sturdy DIY compost bin is to use wooden pallets. This compost bin requires a bit more effort and hardware to make compared to the previously detailed methods. However, it’s a great option for those who want more of a permanent composting area on a low budget.
What You Need:
- Pallets: This method requires 4 to 6 pallets that are all of a similar size. It’s easy to obtain pallets for free from small businesses or directly from distributors.
- Hardware to Construct Bin: You’ll need a power drill, a screwdriver, wood screws, and 4 to 6 L brackets to hole the bin together, and 2 heavy-duty strap hinges, a gate hook and latch, and a utility pull or cupboard handle to create a hinged gate.
- Chicken Wire: This is an optional requirement to reinforce the bin if you live in an area where pests are common.
- Composting Materials: Gather your mixture of green and brown compostable matter.
Steps:
- Pick a location for your pallet bin; this should be somewhere in the sun, ideally south-facing, that’s level and has good drainge. It’s also recommended to place it on top of soil to allow beneficial organisms like worms and microbes to migrate up into the compost.
- Fit the three side pieces of the pallet bin together, saving the sturdiest pallet to use as the fourth front gate piece.
- Holding the side pieces together with the L brackets, drill holes for the screws to fasten the L brackets and pallets together. For a cheaper, lower effort, but less secure option, you can alternatively use zip ties for this purpose.
- When you have fastened the three side pieces, fasten the front gate piece using your strap hinges. This will be easiest if you pre-drill the holes before attaching the hinges.
- Optionally, you can attach a handle and hook and latch on the side of the gate piece opposite to the hinges.
- Another optional step is to reinforce the bin against pests by stapling chicken wire around the outside of the pallets.
- Add your compostable material to your new pallet bin.
- Over the following weeks, keep monitoring and turning your compost pile until your compost is ready to use.
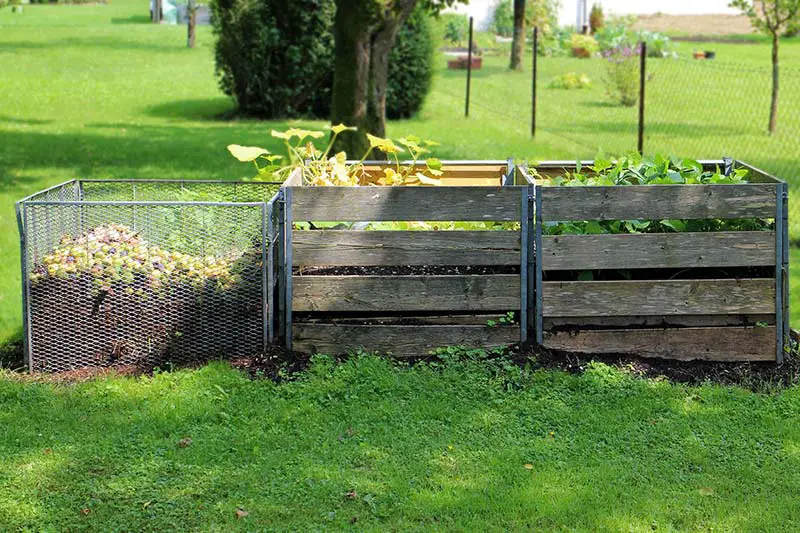
How to Make a Compost Bin From Wire Fencing
For those that want a more substantial composting area, you can make a compost bin from wire fencing. This method requires some free outdoor space, but it’s easily adjustable to fit the space you’re working with. You’ll just need enough space to fit a bin that’s at least 3 to 4 feet in diameter.
What You Need:
- Wire Fencing: To create a three-foot compost bin, you’ll need roughly 10 feet of wire fencing. For a four-foot compost bin, you’ll need about 12 ½ feet of fencing.
- Wire Cutters or Tin Strips: Wire cutters or tin strips are necessary to cut the fencing to size.
- Ties: You’ll need to obtain ties, either zip ties, wire, or twine, to hold the wire fencing together.
- Gloves: Gloves are essential to protect your hands from being cut on the sharp wire.
- Composting Materials: A mixture of green and brown organic matter.
Steps:
- Measure the diameter of the space you’re working with to determine how much wire fencing you’ll need.
- Put on your protective gloves.
- Use your cutters or tin strips to cut the wire fencing pieces to size. When making the cuts, cut the cross wires as close as possible to the upright wires to avoid sharp ends.
- Take your length of wire fencing and form it into a circle. If the fencing tries to spring back into its roll shape, lay it on the ground and walk back and forth over it several times to flatten it.
- Once you’ve formed the circle shape, fasten the two ends of the wire fencing together using your ties of choice. Place the ties at several points at the top, middle, and bottom of the fencing to ensure it’s secure.
- Place your circle of wire fencing where you want the compost bin to be. This should ideally be somewhere close to your garden with enough space that you can turn or harvest the compost.
- Start filling your wire compost bin with your organic compostable matter.
- Over the following weeks, remember to turn your compost pile regularly to encourage the speedy decomposition of the matter.
Making Your Own Compost Bin: Conclusion
Composting is an easy and environmentally friendly way to create a free, nutrient-rich fertilizer for your lawn or garden. We have provided four low-cost options for you to make your own DIY compost bin; the type you choose will depend on the space you’re working with and the resources at your disposal. With that said, all of the options will ultimately leave you with usable compost in a matter of months. The key to success, regardless of your compost bin, is to aerate the pile regularly, keeping it topped up with a good balance of green and brown organic matter.