How to Design a Lawn Sprinkler System
A sprinkler system can save you a lot of time each day. In some climates, it’s ideal to water the grass once a day, lest it becomes dry and damaged. Having to go outside and manually water the grass can be time consuming and laborious.
Sprinkler systems can help cut down on time spent maintaining and watering your garden. Whilst plenty of professional companies can install and build your sprinkler systems for a fee, it is also possible to build and install your own if you’re inclined to. You can even design your own sprinkler system and pay a company to install it to cut down on cash.
Remember that irrigation system installation can be quite invasive, especially if built underground, meaning that if you are planning to build one and install it yourself, you need to have the confidence and tools required to install it successfully.
What are the Benefits of a Sprinkler System?
A sprinkler system has many benefits beyond simply being for convenience. Even though it can be a big weight off your shoulders, it can also improve the quality of the plants and grass in your yard. A well-designed sprinkler system will water grass evenly, preventing browning. Sprinkler systems can also save you money in the long run, as they require less water than it would otherwise take to repeatedly fill up a watering can or a hose to water your garden space.
What is a Sprinkler System Made of?
Whether you’re creating your own system or having someone else make it for you, the materials used shouldn’t be particularly different. The same standard materials are used in almost all irrigation systems, and they’re usually fairly easy to find in hardware stores.
The list of components needed to create a sprinkler system are as follows:
- Controllers / Timers: The timer/controller helps manage your irrigation system. It can control how much water is used in the way of setting times for your system, such as how long the sprinkler should be on for and for how long. There are two types of controllers, Smart Controllers which will automatically adjust based on weather conditions in the area, and Dumb Controllers which are all adjusted manually.
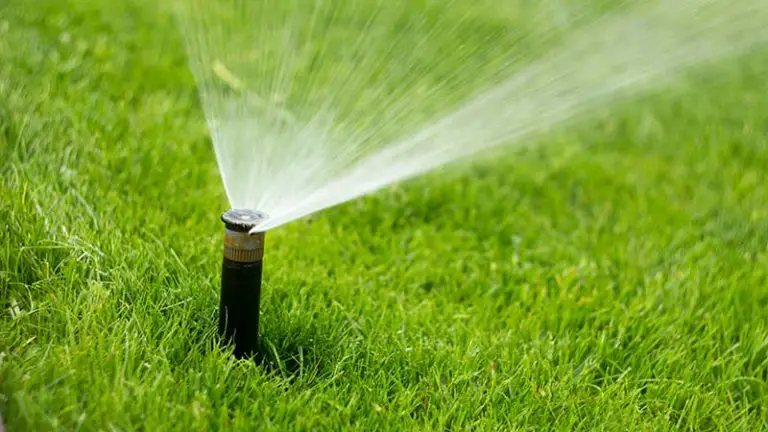
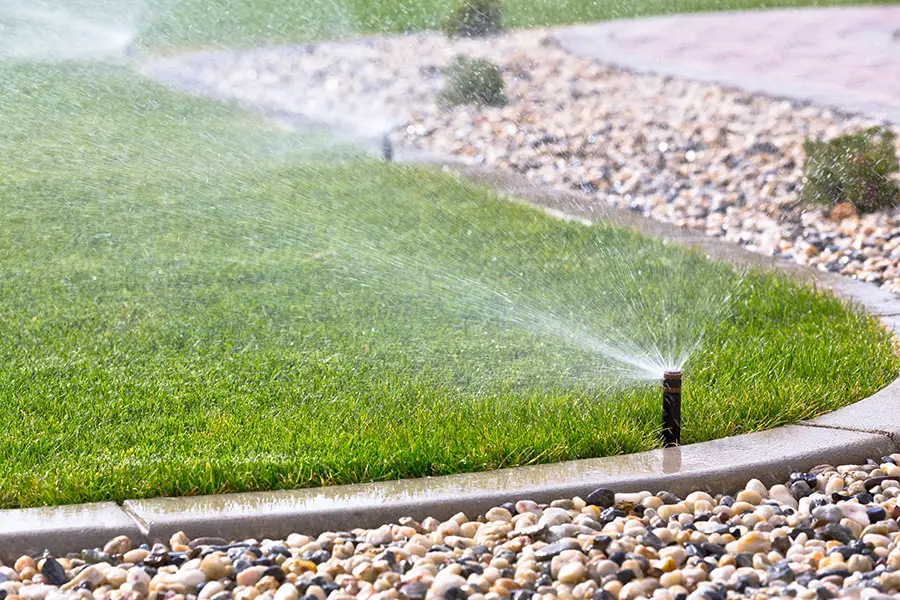
- Sprinkler Heads: Sprinkler heads help to distribute the water as it exits the sprinkler system. If installing an underground sprinkler system, the sprinkler heads are usually the only visible part of the system.
- Valves: Valves control the flow of water around your sprinkler system by opening and closing to allow the passage of water.
- Valve Boxes: While not essential, valve boxes make it much easier to find and access your valves, and also offer additional protection.
- Backflow Preventer: A backflow preventer is an anti siphon device which may be necessary in certain areas.
- PVC Piping: Underground sprinkler systems often require protection in the way of PVC piping. PVC piping is also very easy to install, purchase and replace in the event of damage.
- PVC Fittings: PVC fittings provide bends and turns within your sprinkler system, enabling it to be modified for your garden’s shape accordingly.
- Drains: Drains release water from an unpressurized system and prevent it from becoming stagnant, mouldy or damaged from freezing.
- Wiring: The control box needs to be able to send signals to the valves via the use of wiring.
- Tubing/Risers: This connects the sprinkler head to the system below, allowing water to flow through the system.
How to Plan for a Sprinkler System
Planning for a sprinkler system often requires a considerate look at your yard and its surroundings.
If you are able to, check where your main lines lie beneath your house. If you can’t find any information, phone up your local utility companies and see if they will be able to help you. Knowing where your utility lines lay is important as it can prevent possible damage if you were to begin digging up your garden. In addition to this, ensure that you don’t need a permit for a sprinkler system or invest in a permit if you do need one. Sprinkler systems may not be allowed in some locations due to restrictions placed on household water usage. Ensure that you don’t have a restriction like this in place in your area before beginning to plan for an irrigation system.
How to Make Irrigation Plans
Irrigation plans can be drawn up once you’ve received a heads up from your utilities provider and can ensure that you’re legally allowed to install one.
When drawing up an irrigation plan, however, there are still things that you need to be aware of.
- Take into consideration the size of your garden – This is to ensure that your sizings and dimensions are correct on your diagram. Drawing your diagram to scale will reduce the risk of any unexpected issues arising.
- Think about obstacles – When drawing up your plan, consider things such as trees, shrubs, vegetation patches and whether the lawn slopes. In addition to this, mark off any areas that would be inaccessible such as driveways or patio areas. Trees and shrubs need a wide breadth around them as roots can damage irrigation piping, and areas such as flower beds and vegetation patches may require different water requirements than your grass.
- Consider the control box – The control box is an essential piece of equipment when it comes to sprinkler systems. By knowing exactly where you’re planning on placing it can change the course of the rest of the system.
- Think about obstructions and sprinkler heads – Sprinkler heads usually overlap to ensure that all areas of the garden are covered. Consider things such as trees, bushes or slopes which could potentially prevent your sprinkler heads from overlapping slightly. It’s also a good idea to check your water pressure at this stage to check how many sprinkler heads are needed. We have a much more in depth guide on how to do this in How Many Sprinkler Heads Per Zone?
Water Pressure and Flow Rate
The water pressure and flow rate of your home will determine the amount of sprinkler heads you can run, the amount of water that will pass through your sprinkler system, and the reach that your sprinkler heads will have.
Sometimes, low water pressure in sprinkler systems can be increased, but it’s a good idea to double check your water pressure and flow rate before installing the system to begin with.
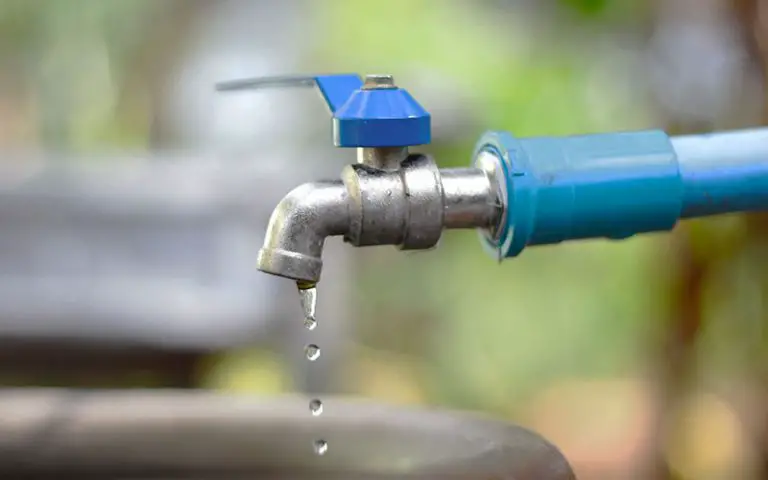
Before checking your water pressure and flow rate, you will need to consider what the source of your sprinkler’s water will be, as there are different sources of water that can be used for irrigation systems. Water can be obtained through your house’s main water supply, or a well.
If you’re using your mains as the water supply for your irrigation system, you should be able to check your water pressure using a water pressure gauge that can be easily purchased from most hardware stores. To do this, simply attach the gauge to your outdoor faucet and turn the water on fully. Ensure that all water is switched off inside the house during this procedure. The gauge’s readings should give you a PSI (pressure per square inch) measurement.
Your flow rate, or GPM (gallons per minute), is a little more complicated to measure as it requires a more practical method of measurement.
In order to measure the GPM (or flow rate):
- Use a gallon container or a five gallon container which has the measurements noted on it.
- Place it under your outdoor faucet and turn the faucet on fully.
- Record how long it takes to fill a gallon.
- Divide the container’s size by how many seconds it took to fill.
- Times that result by 60 to find your flow rate per minute. You can then use this to work out your flow rate by hour as well by multiplying your GPM by 60 again.
Sprinkler Heads
When deciding on your sprinkler system, functionality and aesthetics and work hand in hand. Sprinkler heads are often one of the only parts of the sprinkler system that are visible adobe ground and their function is to ensure that the whole area is watered appropriately. Of course, to ensure that they achieve this, they need to be the correct kind of head for the job.
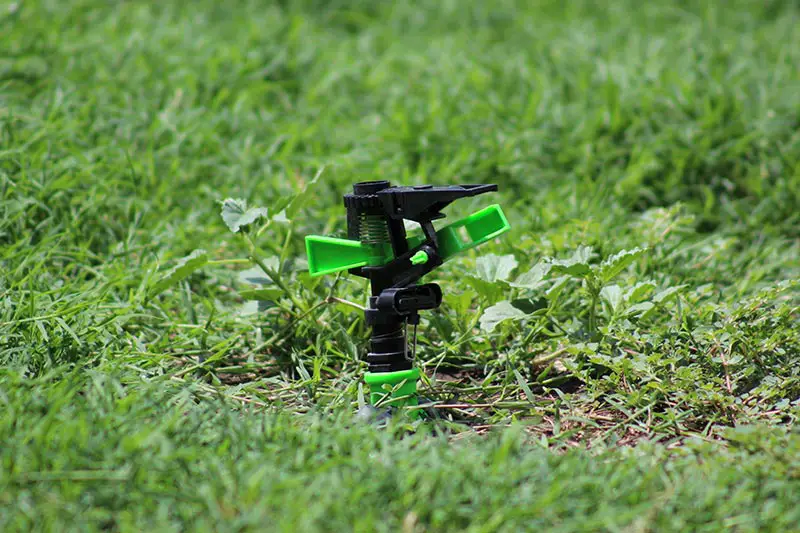
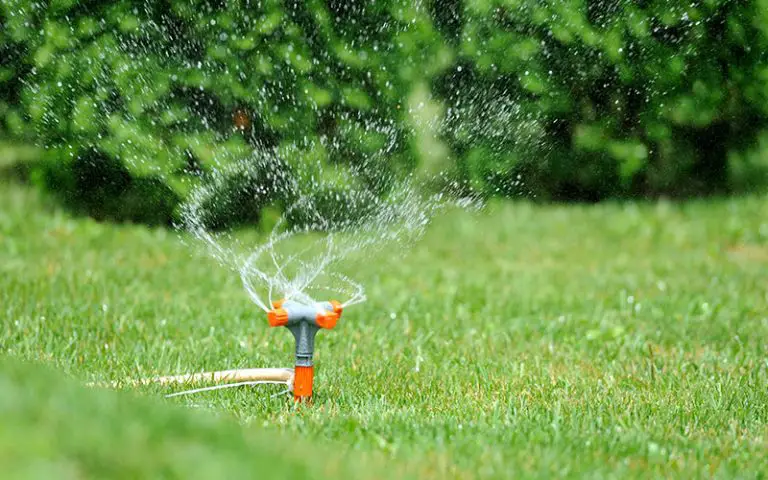
There are different types of lawn sprinklers, but some are better suited for the job than others. The most common types of sprinklers used in underground irrigation systems are pulsating sprinklers, rotary sprinklers, stationary sprinklers and impact sprinklers. A lot of other kinds of sprinklers are best suited for overground systems or are just hose attachments.
- Pulsating sprinklers – Pulsating sprinklers are named for the way in which they move whilst watering the grass. Pulsating sprinklers rotate at a fast pace, sending streams of water into the air and over the yard as they water it.
- Rotary sprinklers – Rotary sprinklers work in a similar way to pulsating ones, but often only produce one stream of water.
- Stationary sprinklers – Stationary sprinklers only target one area in their immediate vicinity. They remain fixed, and are often used in gardens which either have a lot of paving or areas that don’t need to be watered.
- Impact sprinklers – Impact sprinklers produce a continuous stream of water in a circular motion around the yard. They are known for providing good and expansive coverage.
In addition to these sprinklers, you may also wish to consider the ways in which vegetable patches or flower gardens can be watered. Sprinklers are often high-powered and may produce too much water than what is needed in a flower bed or vegetable patch. Hose sprinklers or shrub sprinklers can provide much more suited waterflow for these areas, without the risk of damaging the plants that occupy the area. These can easily be installed or added to the irrigation system providing you have made note during the planning stages.
How to Install a Sprinkler System
Installing a sprinkler system is the hardest part of designing one, due to the technicalities involved and ensuring that it works as intended.
If you haven’t already, you can consider buying an irrigation system kit from a well known supplier and manufacturer to ensure that all parts and pieces of the system will work. These kits come with all basic components and detailed instructions on how to install them. They often come in a variety of sizes and are easily customized to suit your garden’s shape and needs. If slightly daunted by the idea of making your own system from scratch, an irrigation system kit may be the best option for you to purchase, providing your garden meets the demands that these kits often have.
Marking your Sprinkler Heads and Pipes
Using markers, such as landscape flags or stakes, mark out each location you would like to put your sprinkler heads. Connecting these markers using string will help decide where your pipes will go. Make sure to also take into consideration any overlap that your sprinkler’s spray will have, as this is important to ensure that your yard is evenly watered.
Begin Digging
In order to even begin thinking about placing your pipes, you need to begin digging the trenches which they will be laid in. Your trenches should be anywhere from 6-12 inches deep, to minimize any potential damage to the pvc pipes or any potential exposure.
Water Supply
Hooking your irrigation system up to the water supply is, thankfully, a much less laborious job. This can be done by either attaching your system to a spigot or outside faucet or by tapping straight into your main water supply. If tapping straight into your main water supply, make sure that you have the correct permissions to do so. Tapping straight into your main water line may be a better job for a plumber to do, and if possible, it’s always advised to use the spigot as your source of water.
To hook up to a spigot, ensure that your water supply to your house is switched off and allow whatever water there is to drain from the spigot. Once this is complete, you can remove the original spigot and install a galvanized or brass tee. Install a new faucet which matches the size of your irrigation pipe, attach a nipple into the tee’s stem, and finally connect the shut-off valve into that.
Valve Manifolds
Installing the valve manifold involves digging an area just slightly bigger than the valve box, attaching the main water supply line to one end of the valve and then securing it with the clamps that are attached.
Running Pipe
Run the PVC pipe along the trenches that you have dug and place the sprinkler heads at each of the predetermined flagged areas.
Assembly
Assembling the sprinkler system is fairly time consuming as it requires everything to be measured out and cut to size. When assembling, make sure that everything fits together but leave the sprinkler heads out during this step.
Flushing the System
Flushing the system by turning the water back on will remove any potential debris in the system that has occurred during assembly. To flush the system, turn the water back on and manually open each valve and then close them, one by one.
Sprinkler Heads
Once the system has been flushed, sprinkler heads can now be installed.
Control Box
Wiring the control box will give you the ability to control your system from above ground. You can either call in an electrician or do this yourself by following the instructions that should be present in the control box’s manual.
Testing
The chances are that your system will need a couple readjustments before it can be reburied. Now is the time to test it out, using the control box which has been newly wired and installed. One way the sprinkler can be tested is through the tin can test. This involves placing containers around the yard and trying the system out to see if water will reach the various containers. This can be used to ensure that water is reaching every possible area that you need watering. Ensure that your control box works as intended as well during this step, by making sure that the pattern and timing is correct.
Filling the Trench
Once you’re content with the way your sprinkler system is working, you can now begin to fill the trench which it is built inside. Fill in the areas with soil and then replant sod atop to hide any clear signs of digging.
Maintaining a Lawn Sprinkler System
Maintaining your sprinkler system is an ongoing process which doesn’t stop as soon as you’ve reburied it.
Whilst a sprinkler system is a great way to reduce workload, it still requires some maintenance to ensure that it is working correctly at all times. This can include doing tests at the beginning of each season to ensure that all sprinkler heads work properly and that the controller box is working as intended. It can also mean cleaning your sprinkler heads to ensure that they don’t get clogged, and troubleshooting if your system fails to turn on.
Sprinkler systems aren’t used all year round, and are often switched off during winter months. It’s important to make sure that you winterize your sprinkler system before the cold weather begins, to reduce any risk of damage to the pipes or valves. We have a guide on how to winterize a sprinkler system here.