Aerate or Dethatch First? A Complete Guide to Lawn Care
Dethatching and aeration are two excellent lawn care practices that can bring about a host of benefits for both new and mature grass. If you need to carry out both processes, for instance before seeding or overseeding your lawn, you may be wondering what order is best; should you dethatch or aerate first?
For best results, you should dethatch first before you aerate a lawn. Dethatching is the act of reducing the thatch layer, while aerating involves breaking up soil compaction; dethatching first will ease the labor required for the aerating process, in addition to improving the results of both processes overall.
What is Lawn Dethatching?
Dethatching is the process of breaking up and reducing thatch on your lawn.
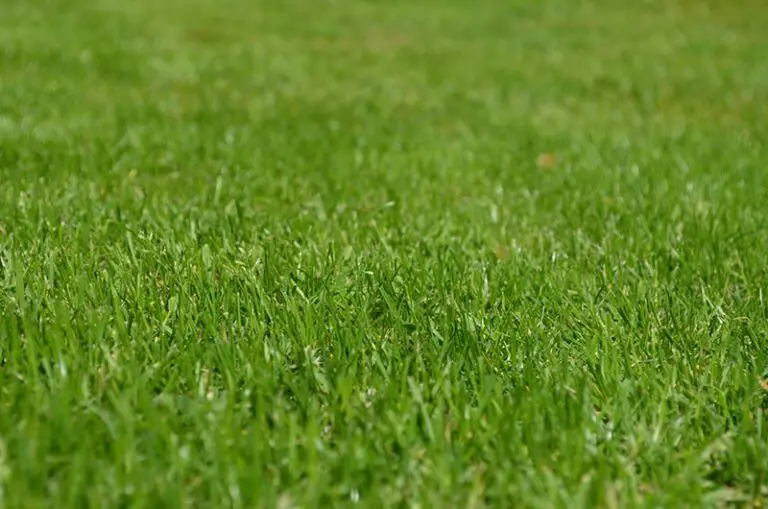
Thatch is the tangled layer of living and dead organic matter that sits on the soil surface beneath the upward growth of the grass. The thatch layer is made up of grass blades, roots, and stems, as well as other lawn debris that accumulates naturally over time.
A small amount of thatch can actually be beneficial for the lawn and won’t cause any issues with the growing grass. However, when the thatch layer grows too thick (i.e. more than ½ inch), it forms a barrier on the soil surface. This barrier blocks water, air, nutrients, and new seed from reaching the soil and penetrating the turf. It also increases the lawn’s susceptibility to pest infestations and the development of fungal lawn disease. In order to fix this, it’s necessary to reduce the thatch layer by dethatching the lawn.
When to Dethatch Lawn
The best time to dethatch a lawn is during the period of most active growth for the grass species growing in it. For cool-season grasses, this means dethatching the lawn in the early spring or early fall; for warm-season grasses, you should instead dethatch the lawn in the late spring to early summer. At these respective times of year, the grass is growing most vigorously and will recover quickly from the dethatching process.
How Often to Dethatch Lawn
How often you dethatch your lawn will depend on two factors: your grass type and the amount of fertilization your lawn receives. Some grass types require annual dethatching, while others may only need to be dethatched every 2 to 5 years.
If you have creeping bentgrass, Kentucky bluegrass, Bermuda grass, or Zoysia grass, your lawn will benefit from annual dethatching as these grasses are more prone to a rapid thatch buildup. Grasses that are less prone to thatch build-up include tall fescue and ryegrass, which may only need dethatching every 5 years. Regardless of your grass type, you should check the thatch layer each year to monitor its thickness.
Aside from your grass type, other factors can cause the thatch layer to build up more quickly. For instance, overfertilization, overwatering, or an absence of beneficial microbial activity in the lawn can all contribute to the development of thatch. These conditions increase the rate at which the grass grows while slowing down the decomposition of grass clippings; as a result, this exacerbates the rapid build-up of the thatch layer. Again, annual monitoring of the thatch layer is the best practice as this will indicate when it’s time to dethatch your lawn.
What is Lawn Aeration?
Lawn aeration is the process of reducing compaction in soil by punching holes in the turf with an aerating tool.
When soil is compact, the soil particles become tightly packed together, pushing out spaces and pockets in the turf. These spaces are necessary for the movement of air, water, and nutrients in the soil and around the grass’ roots. Compaction occurs naturally over time, being primarily caused by traffic and weather conditions that affect the lawn. It’s then necessary to aerate the lawn to counteract the negative effects of these conditions.
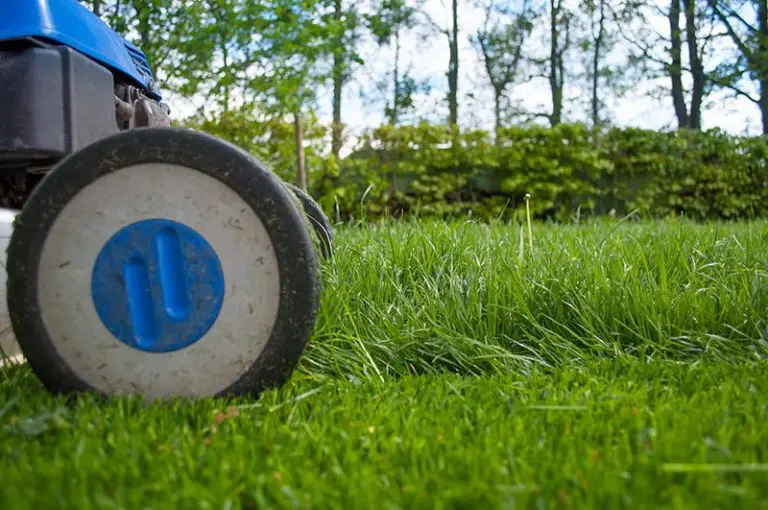
While you can use a variety of tools to aerate your lawn, the most effective method is to use a core aerator; this is a tool that has a long handle with a hollow tine at one end which removes plugs of soil as you use it around your lawn. The process breaks up the hard soil and leaves the lawn full of holes; as a result, air, water, and nutrients are better able to penetrate and circulate the turf, where they can be taken up readily by the grass’ roots. Aeration also enables the grass to grow deeper root systems to take up these substances more easily.
When to Aerate Lawn
As is the case with the dethatching process, you should aerate your lawn during the period of most active growth for your grass type. You should therefore aerate your lawn in spring or fall if you have cool-season grass, or late spring to early summer if your grass is warm-season. Again, this is to give the grass the best chance of a quick recovery from the stress of the aeration process.
How Often to Aerate Lawn
How often you aerate your lawn will depend on the amount of traffic it receives, as well as the type of soil your grass is growing in. Depending on these factors, it may be necessary to aerate annually or every 2 to 3 years.
If your lawn sees a lot of traffic from people, pets, or vehicles, it’s more likely that it will be compact in certain areas or throughout the entire lawn. If this is the case, your grass will benefit greatly from annual aeration.
Similarly, if you have clay-heavy soil, annual aeration is highly recommended to keep your grass healthy; clay-heavy soils are far more prone to compaction due to their dense structure. If you have sandy or loamy soil, these soil types are naturally well-aerated and therefore require less frequent aeration, i.e. every 2 to 3 years. Regardless of soil type, it may only be necessary to aerate this often providing the lawn is generally in good growing condition.
Dethatching vs Aeration
Dethatching and aeration are two very similar lawn care practices that are carried out to achieve similar results. By carrying out either process, your ultimate goal is to improve the circulation of air, water, and nutrients in the turf, in addition to creating the space for your grass plants to grow deep, healthy root systems. Both dethatching and aeration are also common practices to carry out before seeding or overseeding your lawn.
The aeration process can help to dethatch the lawn, as can the dethatching process help to aerate it. However, to get the best results, you should carry out both processes to get your lawn in best growing condition for your existing grass or before adding new seed. This raises the question of whether you should dethatch or aerate first; we answer this question in the following section.
Should I Dethatch or Aerate First?
If carrying out both processes, you should dethatch the lawn first before aerating the soil.
By dethatching first, you can initially remove the excess organic matter and debris from the lawn. You can then follow this up with the aeration process to effectively break up compaction and create the space for fertilizer, water, or new seed in the planting area. The dethatching process will ease the labor involved with aerating the lawn as there will be less organic matter to break through with your chosen aeration tool.
How to Dethatch Lawn
As we’ve just explained, you should dethatch your lawn first before aerating for best results from both processes.
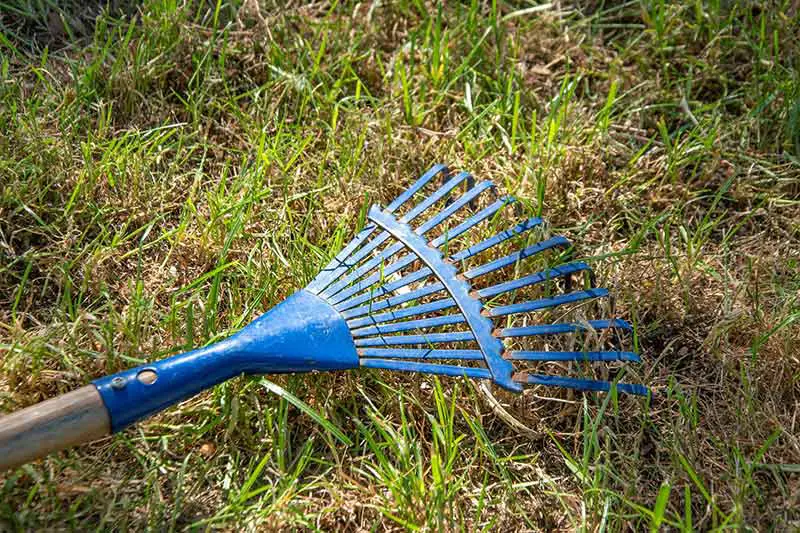
1. Choose Dethatching Tool
You first need to choose the appropriate tool to dethatch your lawn. For smaller lawns, you can use a dethatching rake or dethatching mower attachment. For larger lawns, it’s more suitable to use a dethatcher – these machines are also known as power rakes, vertical cutters, or verticutters.
If you don’t already own the appropriate tool, these are available to rent from most hardware or garden stores. If you choose to rent a powered tool, ask your provider to adjust the spacing and cutting depth of the blade to suit your particular grass type. In general, the blade should be set so it won’t cut any more than ½ inch deep into the soil.
2. Prepare Lawn for Dethatching
Prepare the lawn for the dethatching process by removing all debris such as rocks, stones, branches, and any other objects that may interfere with your equipment. Mow your lawn to half the height that you would typically mow. Avoid fertilizing the lawn right before you plan to dethatch.
3. Mark Irrigation Lines and Sprinkler Heads
Locate irrigation lines and sprinkler heads and mark them out in the area you plan to dethatch. You can use brightly colored markers or poles to demarcate these areas to avoid when dethatching the lawn.
4. Dethatch Lawn
After preparing the area, you can begin using your dethatching tool to dethatch the lawn.
If using a dethatching rake, you simply use this as you would with a regular rake. Use the rake to dig into the thatch layer before pulling upward on the tool to remove the thatch. As you do this, you should be able to feel and see the separation of the thatch from the soil.
If using a powered dethatching tool, follow the instructions for your tool to operate it correctly. If you have rented the tool, you can request these instructions from your provider.
5. Rake Up Loose Thatch
Once you’ve finished dethatching the entire lawn, it will appear quite messy. Use a regular rake to remove the loosened thatch that remains on the lawn. You can then move on to the aerating process, as we explain in the next section.
How to Aerate Lawn
Follow these steps to aerate your lawn after the dethatching process.
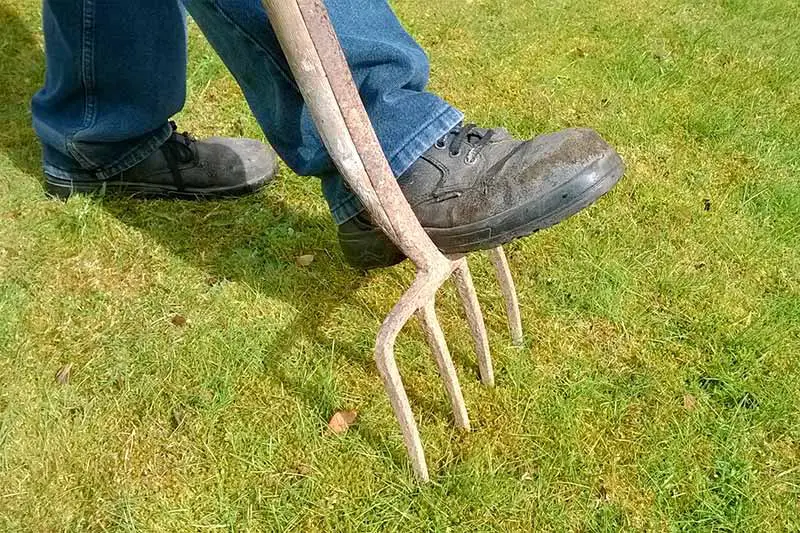
1. Choose Aerating Equipment
If you don’t already own one, you’ll need to purchase or rent an appropriate tool for aerating. While you can aerate your lawn with a pitchfork, this is a suboptimal choice; such tools only offer spike aeration, a method which may actually worsen issues with compaction rather than solve them. You should instead opt for a core aerator as these tools actually remove plugs of soil rather than just pushing holes into the turf.
2. Water Lawn
On the day prior to when you plan to aerate the lawn, moisten the area with about 1 inch of water. This is to soften the top layer of soil which will ease the labor of the aeration process.
3. Mark Irrigation Lines and Sprinkler Heads
Provided you carried out the steps in the previous section, you should have already marked any sprinkler lines or irrigation heads in the lawn. If not, take this opportunity to mark out these objects in your lawn to avoid accidental damage.
4. Aerate Lawn
Begin aerating your lawn, following the usage directions for your device of choice. If your lawn is severely compact, or you’ve never aerated it before, go over the entire lawn twice. Make one pass to cover the lawn in horizontal rows before making a second pass in rows perpendicular to the first set.
5. Leave Soil Plugs on Lawn
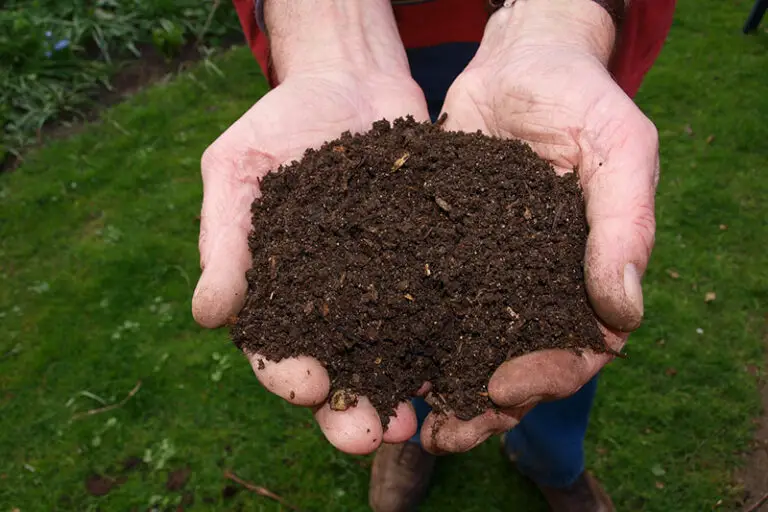
If using the core aeration method, your aerator will pull 1 to 2 inch plugs of soil from the turf. Once you’ve finished aerating, leave the soil plugs on the lawn. You may be tempted to pick them up to improve the lawn’s appearance straight away; however, these plugs are far more beneficial if left on the lawn. Over time, they will break down and return nutrients to the soil, acting as a slow-release fertilizer. Removing these plugs would be wasteful as you would simply be removing chunks of soil unnecessarily.
6. Apply Fertilizer, Amendments, And/Or Overseed Lawn
Once you’ve finished dethatching and aerating your lawn, it will now be in the ideal condition to receive fertilizer, amendments, or new grass seed. Fertilize the lawn, amend the soil pH with lime or sulfur, and/or overseed the lawn at this stage.
If you’re adding new seed, the best type of fertilizer to use is a starter fertilizer; this fertilizer contains all of the nutrients that new grass needs the most for a healthy establishment. If not, you can use a fertilizer with the best fertilizer ratio for your mature grass and the soil’s current nutrient content.
If you need to amend the soil pH, add a suitable material to raise or lower the pH. For grass growing, your soil should be in a pH range of 6.5 to 7.0. A pH below 6.5 indicates acidic soil, therefore you should add an alkaline material such as lime to raise the pH. Conversely, a pH above 7.0 indicates overly alkaline soil, and will therefore need an acidic amendment like sulfur to lower the pH. You can find out the soil’s pH and nutrient content by carrying out a soil test.