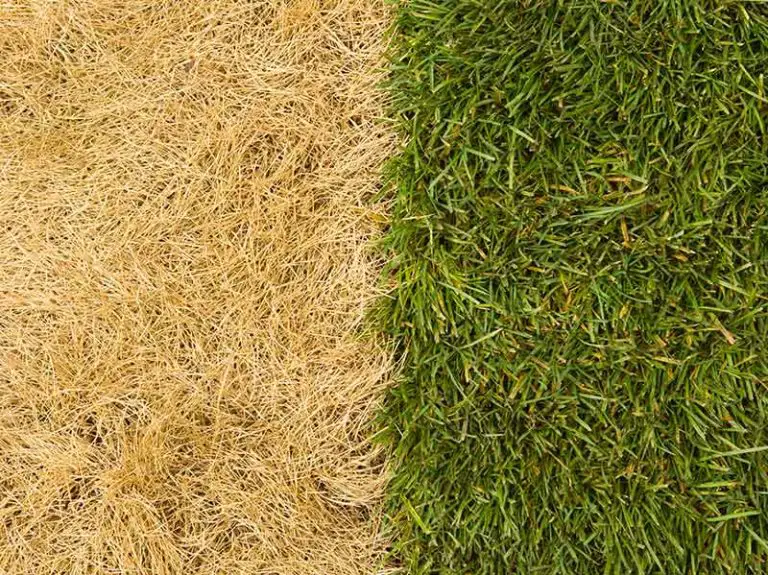
How to Dethatch a Lawn
Your lawn has three layers – the top layer is the grass, the bottom layer is the soil, and the layer of matter that sits at the base of your grass blades in between the grass and soil is known as ‘thatch’. Dethatching is the process of removing this layer using specialized dethatching equipment.
While a small layer of thatch between your grass and soil can be beneficial to the health of your lawn, having an excessive buildup of thatch will stifle the grass plants, increase the risk of lawn disease and encourage the reproduction of harmful fungi and insects in your yard. Read through our guide to learn more about the causes of thatch buildup, followed by guidance on when to dethatch a lawn, and a step-by-step method on how to dethatch a lawn.
What is Thatch?
Thatch is a matted layer of organic ‘debris’ of living and dead plant material that accumulates over time on top of the soil at the base of your grass stems. This can be understood better if you imagine your lawn as being made up of three layers:
- Grass blades are at the top layer which is visible when you look across your lawn
- Thatch is in the middle layer underneath the grass blades and on top of the soil
- Soil sits at the bottom layer and isn’t typically visible to the eye
Some organic materials are able to break down quickly in your lawn as long as it’s healthy, such as small grass clippings or mulched leaves. Other materials take a bit longer to decompose, and when the buildup outpaces the decomposition, a thick layer of thatch starts to form.
It used to be common belief that thatch was only made up of leftover grass clippings, but we now have a better understanding of all the different types of organic matter that can form thatch. The tightly interwoven layer is made up of grass stems, roots, rhizomes, and stolons, among other types of organic plant material that builds up between the grass and the soil faster than it can decompose.
What Causes Thatch?
There are a number of different factors to do with the quality and biological makeup of your soil that can all have an impact on how quickly it takes thatch to accumulate in your lawn. Some of the most common causes for thatch buildup are listed below.
Lack of Earthworms in Soil
Having a low presence of earthworms in your soil can have an impact on the amount of thatch that accumulates in your lawn over time. As earthworms burrow, they increase the amount of oxygen in the soil and encourage the speedy breakdown of organic material. Without these helpful friends, organic debris between the soil and grass takes a longer time to break down, which in turn contributes to the amount of thatch buildup on your lawn.
High Soil Acidity
Having a soil with a high pH, or in other words, soil that is highly acidic, is another factor that has been associated with an increased thatch buildup. Healthy microorganisms in the soil function at their best when the soil’s pH is within a neutral range, which is somewhere between a pH level of 6.0 and 8.0. You can carry out a soil pH test to discover if this could be a contributing factor to your thatch buildup, then adjusting your soil pH if necessary. This can be done by adding pH adjusting materials to get your soil in the desired range; a common method to reduce acidity in soil is to add lime.
Too Much Fertilization
Fertilizing your lawn can be extremely beneficial for its health and resistance against the elements, but it is possible to over-fertilize a lawn without knowing exactly when and how often to fertilize. Nitrogen-rich fertilizers are great for encouraging grass plant growth, however, overzealous applications of these fertilizers can lead to excessive growth of the plants that natural decomposition processes can’t keep up with, accelerating the development of thatch. Overfertilization and adding too much nitrogen can also trigger problems with soil acidity which further increases the thatch development.
Poor Aeration
Poor aeration of the soil can encourage thatch buildup. As part of any rigorous lawn care routine, grassy lawns need to be aerated on a fairly regular basis. This is the process of breaking up compacted soil by creating little holes in it, increasing the availability of water, oxygen, and nutrients to any plants growing in it. This process also provides grass plants with enough space in the soil to grow roots. Without the space, grass plants are unable to grow their roots down into the ground, which then contributes towards the matted layer of thatch on the soil.
Grass Species
Some species of grass are more prone to a thatch buildup than others. Grasses that grow and spread vigorously are more likely to need regular dethatching, such as Kentucky Bluegrass, Bermudagrass, and creeping fescues. Grasses that are clump-forming rarely need to be dethatched, such as tall fescue and perennial ryegrass.
Why Dethatch a Lawn?
Before you start frantically dethatching your lawn, you should know that a small amount of thatch can actually be beneficial for the health of your grass. A layer of thatch that’s less than ½-inch thick acts as a natural organic mulch, helping the soil to retain moisture that would otherwise be lost through evaporation, and protecting the grass plants from fluctuations in the soil’s temperature by protecting the crown of the grass plants. A fine layer of thatch can also help to reduce soil compaction. As long as the thatch layer isn’t too thick, air, water, and nutrients will all be able to penetrate the soil and reach the grass’ roots, and the lawn will remain healthy and thriving.
With that said, when thatch is allowed to build up over time, it starts to become detrimental to the lawn’s health. A layer of thatch that’s 1-inch thick or more creates a barrier for the grass plants, preventing them from having access to water and fertilizer. If you let thatch accumulate without regularly dethatching it, not only will it cause the grass to turn yellow and/or die completely, but it can also damage the soil and prevent newly planted grass from growing. This is because the grass’ roots become entangled and trapped in the thatch, leaving them vulnerable to the effects of stress, heat, and drought, and if water starts to accumulate in the thatch layer, the grass plants are at risk of suffocating due to the lack of air available at their roots. A thick layer of thatch also provides an ideal breeding ground for fungal lawn diseases and unwanted harmful insects such as mosquitoes.
When to Dethatch a Lawn?
As we’ve discussed, a layer of thatch that’s about ½ an inch thick is ideal, but when the thatch reaches a thickness of 1 inch or more, you’ll need to start dethatching your lawn to keep up the health of your grass. You also need to carry out the dethatching process during a period of active growth for your grass species.
How to Determine Thickness of Lawn Thatch
Knowing when to dethatch a lawn is highly dependent on the current thickness of the thatch. Using a trowel or spade, dig up a few small wedges of grass and soil from different areas in your lawn. Looking at the three layers of grass, thatch, and soil, identify the spongy brown thatch layer in between the grass and soil, and measure the thickness in inches. If the thatch is only about ½-inch thick then you should just leave it as it is, but if it has a thickness of 1 to 2 inches or even more, then you need to start planning how you’re going to dethatch the lawn.
When is the Best Time To Dethatch a Lawn?
The best time to dethatch a lawn is during your grass species’ peak season of active growth, which depends on whether you have a warm-season grass species or a cool-season grass species. Dethatching during the grass’ time of most vigorous growth ensures that your lawn will make a quick recovery and successfully grow back in after the dethatching process.
- For warm-season grasses, dethatch in the late spring to early summer after they have greened up but before they enter their peak-growth phase.
- For cool-season grasses, dethatch in the late summer to the early fall to fit into their peak-growth phase before the winter frost sets in.
You should never attempt to dethatch during your grass species’ dormant months, or when your lawn is in a stressed or poor condition. If you do, you may end up damaging it even further to the point that it’s beyond recovery. Make sure to dethatch at a time when you expect at least three or four weeks of favorable growing weather to follow.
How Often to Dethatch a Lawn?
It takes a reasonably long time for thatch to build up, so you won’t need to dethatch your lawn every single year. You’ll probably find that you need to dethatch every five years or so instead, but this will ultimately depend on your grass type and the aforementioned factors that can speed up the development of thatch. Check the thickness of your thatch once per year as part of your annual lawn maintenance routine to make sure it isn’t becoming too thick, and dethatch when it becomes necessary.
How to Dethatch a Lawn
If your thatch is only about 1-2 inches thick, you can attempt to DIY and do the job yourself. However, if your thatch measures over 2 inches thick, it’s probably a better idea to consider hiring a professional landscaping company to do the job. Excessive amounts of thatch may take several sessions of dethatching to get rid of, while removing too much thatch at once may seriously damage the roots of the grass.
Step 1: Mow Grass to Half Height
Mow your grass to half of its usual height.
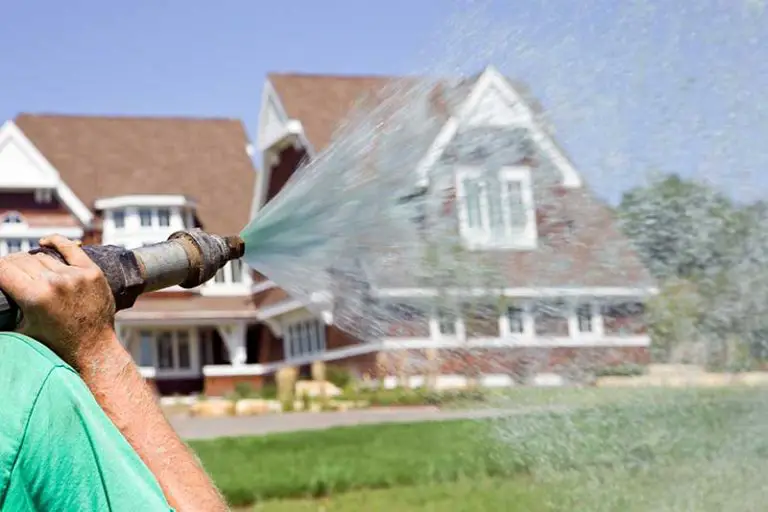
Step 2: Water Lawn
Two days before you plan to dethatch the lawn, water your grass thoroughly. This is necessary because you need to dethatch when the soil is moist, without being saturated and soggy. As a note, you should avoid adding any fertilizer to the soil at this stage.
Step 3: Pick Dethatching Method
There are a few different methods of dethatching which all require different tools. The one you choose will depend on the size of the lawn you’re working on and the amount of thatch present.
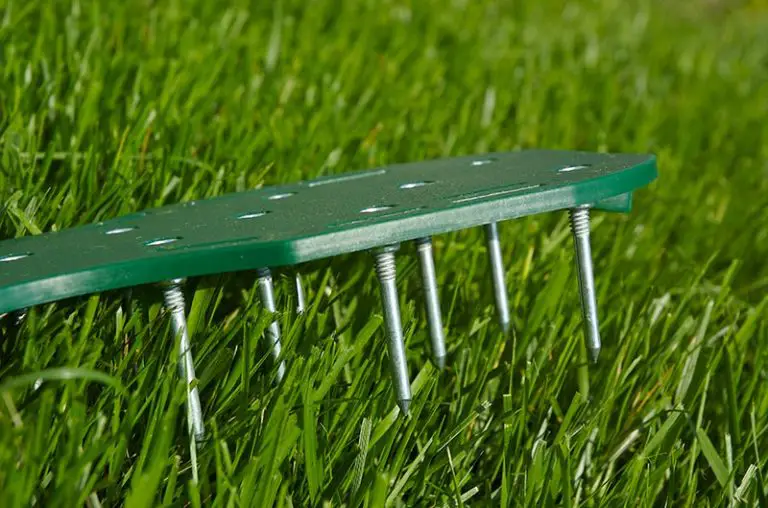
Manual dethatching rakes: The curved blades of these heavy, short-tined tools are designed to enable you to pull up thatch by digging down into the lawn as you rake. They are best for lawns that have light thatch and to carry out general thatch maintenance on smaller areas. You can buy manual dethatching rakes at most garden stores.
Power rakes: These devices use a similar mechanism to a mower, and have rake-like tines that rotate and pull up thatch by digging into it at the soil level. They work best for lawns with thin layers of thatch, and are more suitable for lawns with hardy, healthy grass that will withstand intense raking. Power rakes are available to rent from equipment rental companies, especially around dethatching season.
Vertical mowers: Also known as verticutters, these devices have vertical blades that pull thatch up to the surface of the lawn by slicing vertically down through the thatch layer into the soil. They also tend to pull up grass roots along with the thatch. You can adjust the blades to control how much thatch is removed at once. Vertical mowers are best for lawns that have a thick layer of thatch and are in need of serious renovation. These devices are also available to rent from equipment rental companies.
Step 4: Dethatch Lawn
Depending on the tool you’ve picked, follow the correct method to dethatch your lawn.
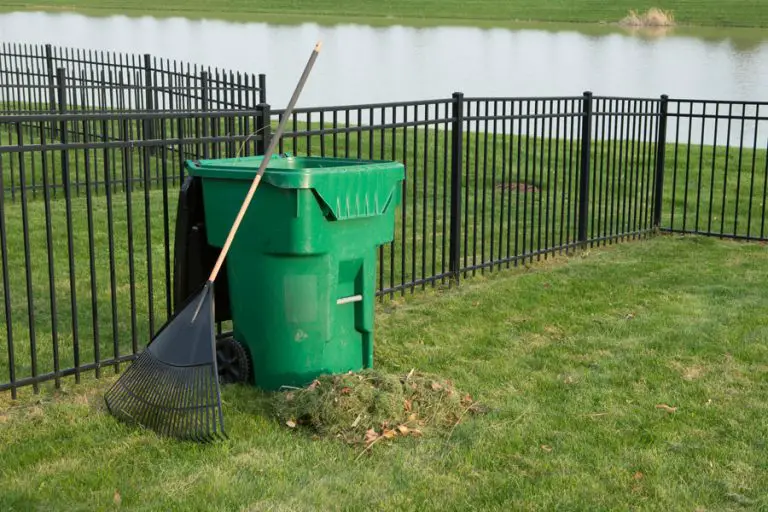
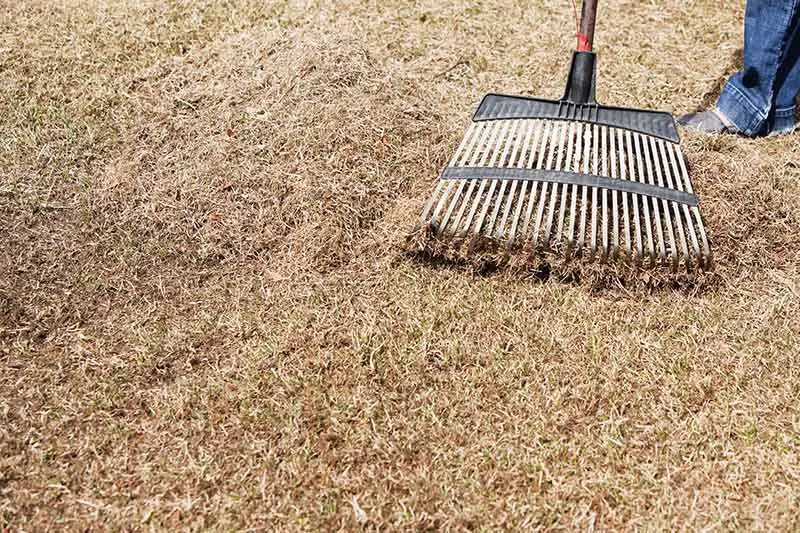
Manual dethatching rake: Rake the grass, digging deep into the thatch as you go to loosen it. Rake up the leftover thatch and debris with a regular rake and throw it onto your compost pile.
Power rake: Mark or flag where there are irrigation heads and other hidden objects in your lawn before you start using the power rake to prevent damaging anything. Take the power rake and run it over the lawn in a pattern that only covers each area of the grass once. When you’re finished your lawn will probably not look the best, but it will improve after raking up the debris and giving the grass some aftercare with a proper watering and fertilization schedule.
Vertical mower: Mark or flag where there are irrigation heads and other hidden objects in the lawn before using the vertical mower. Run the device across the whole lawn in one direction, then once again in a perpendicular direction to the first run. Use a rake to remove the leftover thatch and debris.
Aftercare For a Dethatched Lawn
Your grass will probably look a bit battered regardless of the method you have chosen to dethatch the lawn. Following all these steps of proper aftercare, your lawn should start looking a lot better in about 3 to 4 weeks time.
Aeration
Lawn aeration is a lawn care practice often carried out after dethatching. Aeration is the process of creating small openings in the lawn’s turf and underlying layer of soil, penetrating through the root and thatch layers to allow water and oxygen to flow down into the soil and reach the roots of the grass. It’s particularly beneficial when carried out on compacted or hard dirt. It is typically done using a method known as ‘core aeration’, which involves the use of a motorized machine that punches small soil plugs out of the lawn to create many small holes in the soil through which water and air are able to freely pass and reach down to the grass’ roots.
Overseeding
If you notice bare patches in your grass after dethatching, you may need to overseed it to restore your lawn back to its full health. When choosing the best grass to overseed your lawn with, make sure to pick the right seed for your climate, whether that’s a cool-season grass or warm-season grass. See our guide on How to Overseed a Lawn for everything you need to know on how to carry out this process.
Watering
After you’ve finished any necessary aeration or overseeding work, you can give your entire lawn a good water. You should aim to make the soil moist without making it soggy or waterlogged. Take special care with this if you’ve had to overseed the lawn, as overwatering at this stage could wash away or suffocate your new grass seed. We have provided guidance on the best practices of both how to water new grass seed and how to water an established lawn.
Fertilization
Finally, you should fertilize your lawn using a high-quality fertilizer to give it a boost of nutrients and help it to recover from the dethatching process as quickly as possible. The fertilizer that you choose to apply will depend on what nutrients and other particular requirements your soil has.